Export Panel for 3D Views, Charts and Tables
The export panel, located on the right-hand side of 3D views, charts and tables, can be used to generate images, files, and videos with just a couple of clicks.
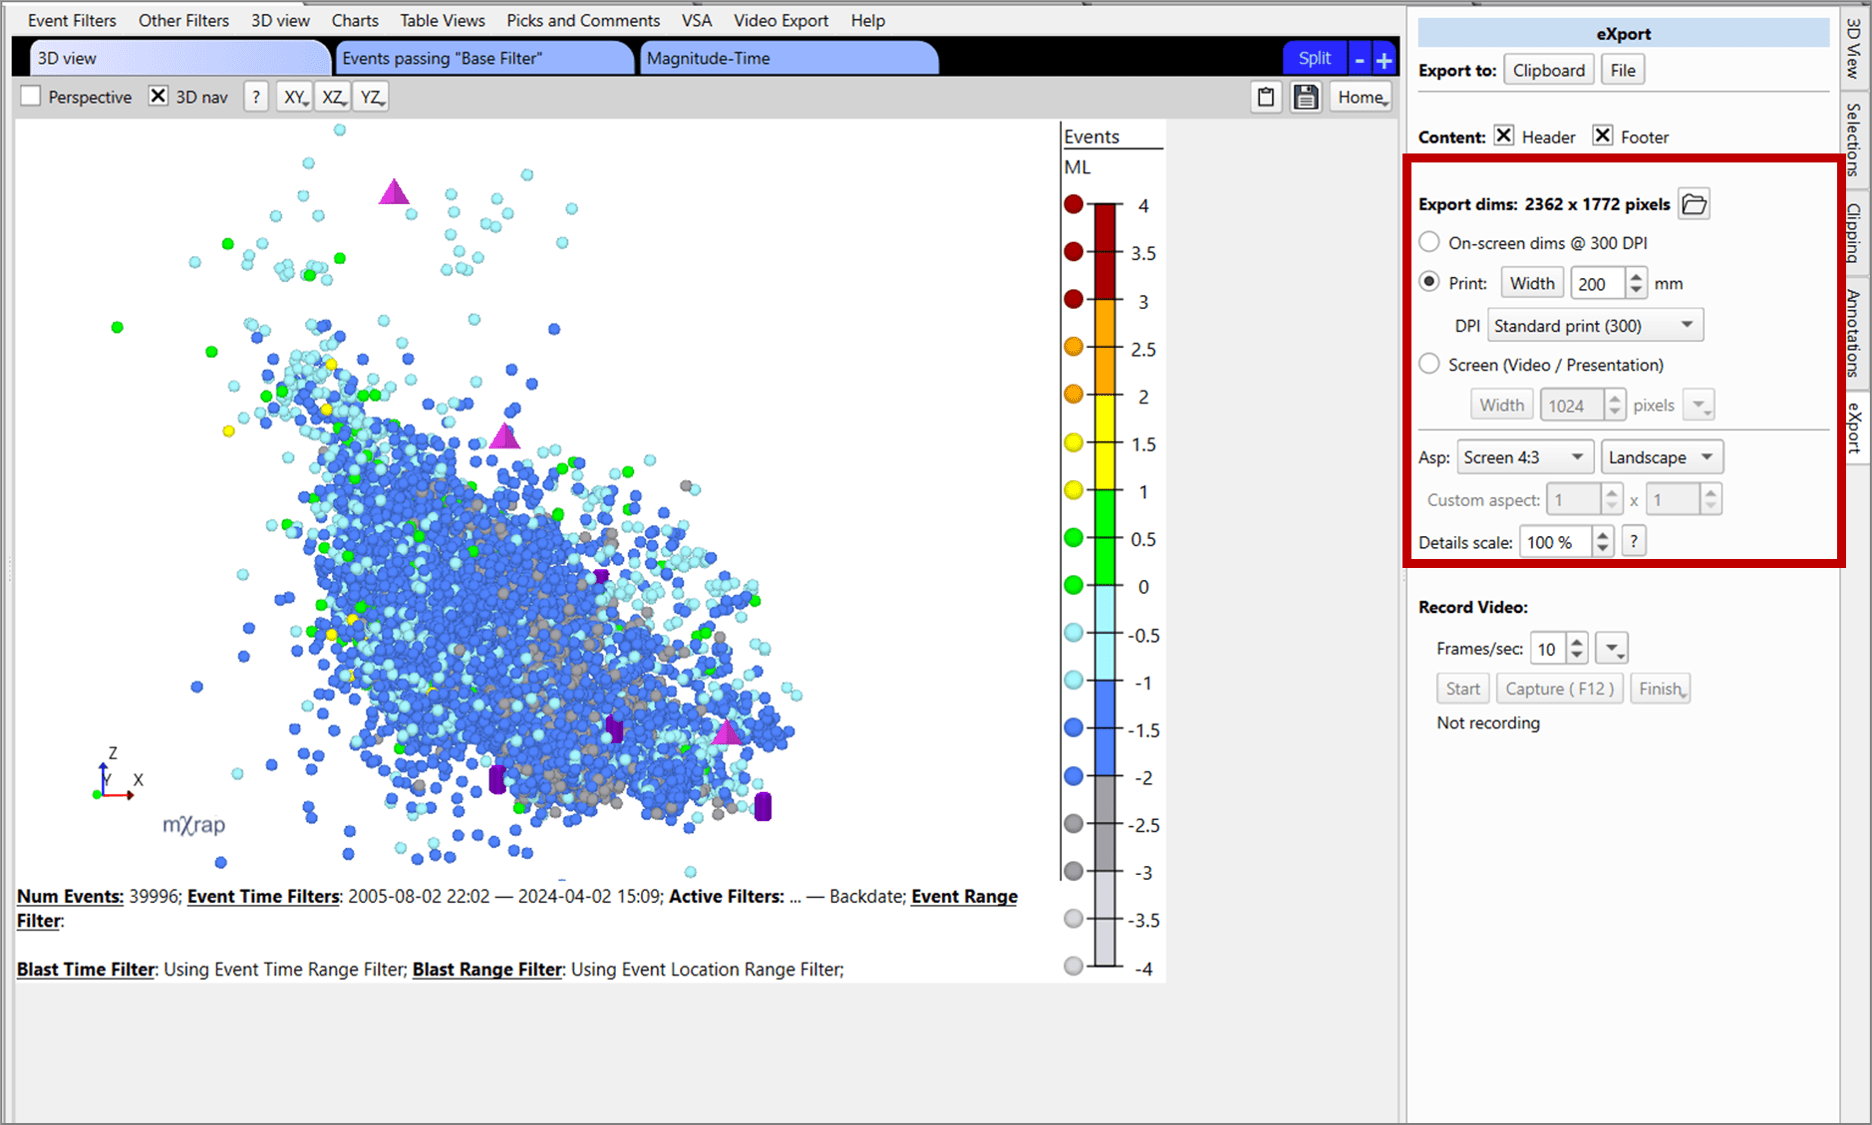
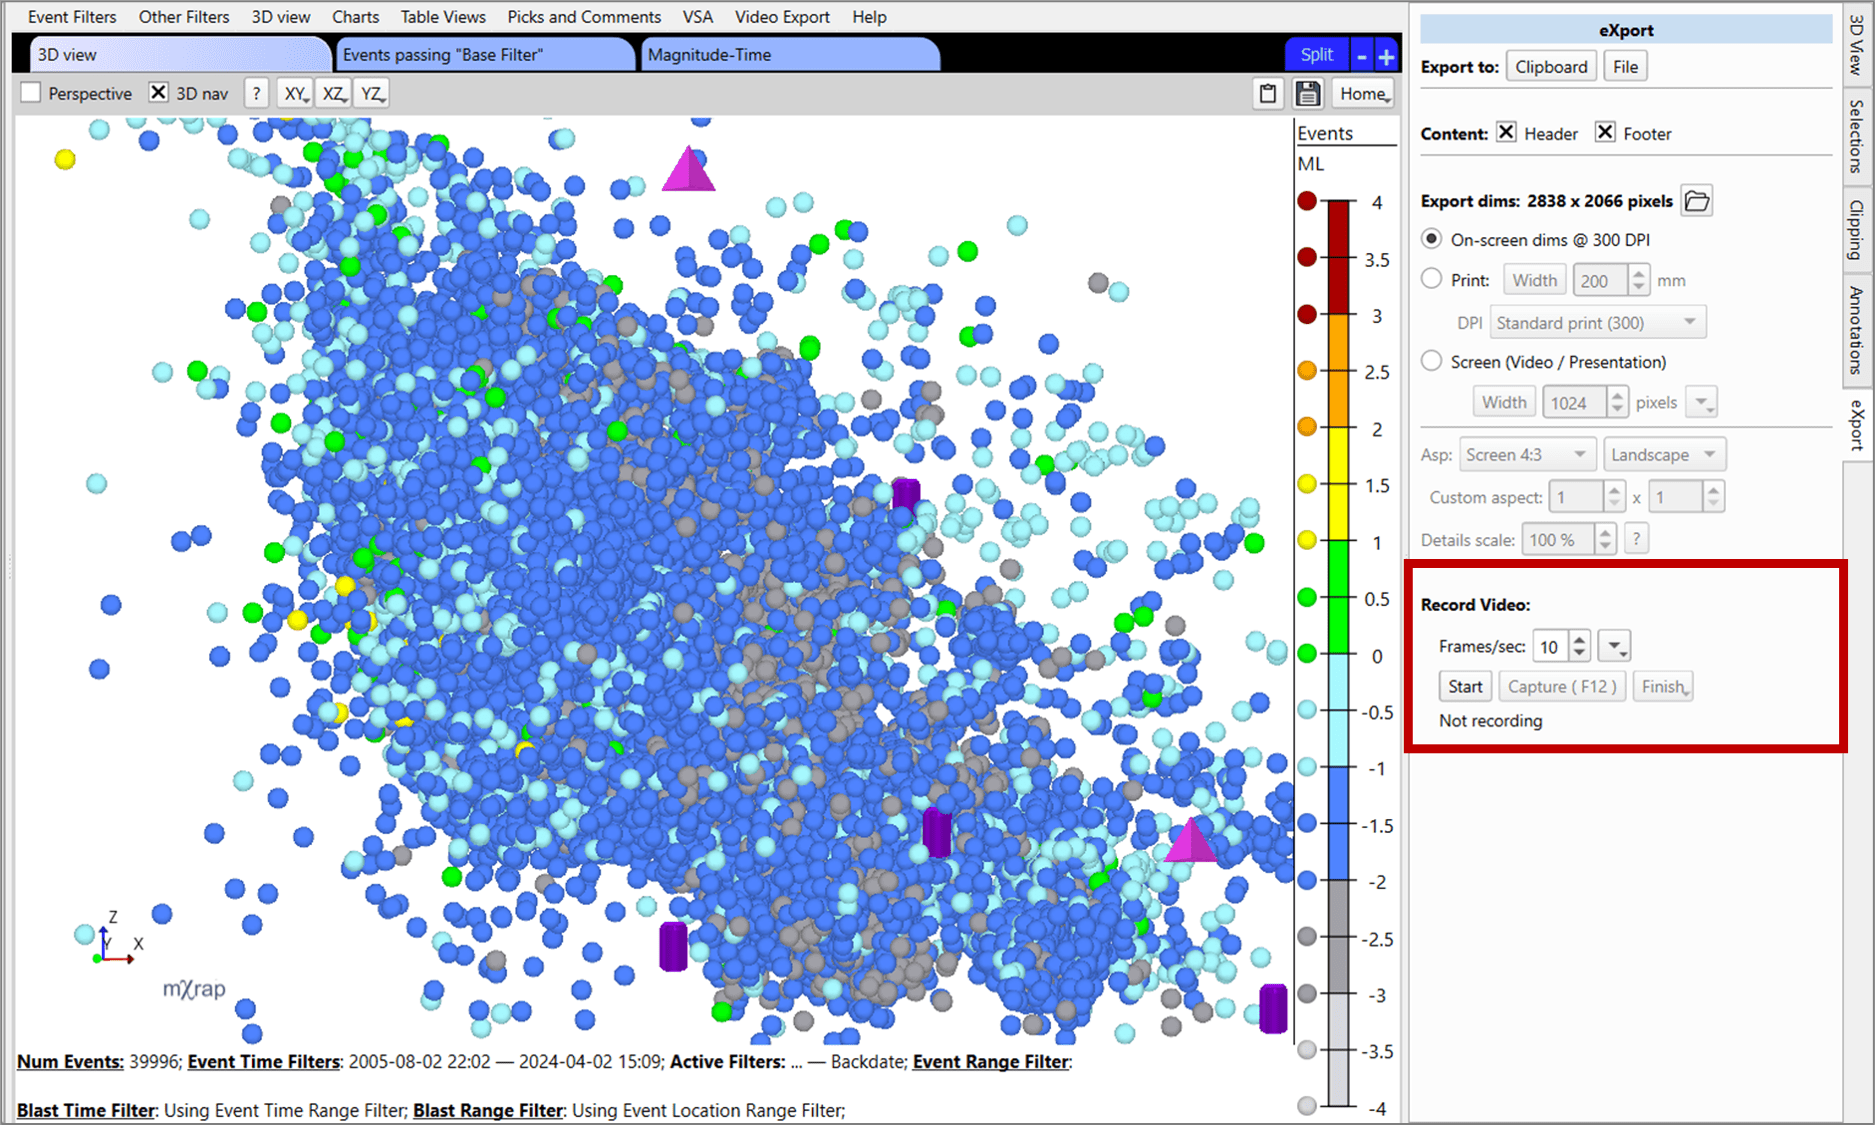
This panel is particularly useful for preparing presentations and papers that require figures with specific dimensions or font sizes. Use the 'Export dims:' functions to create high quality images of a specific size:
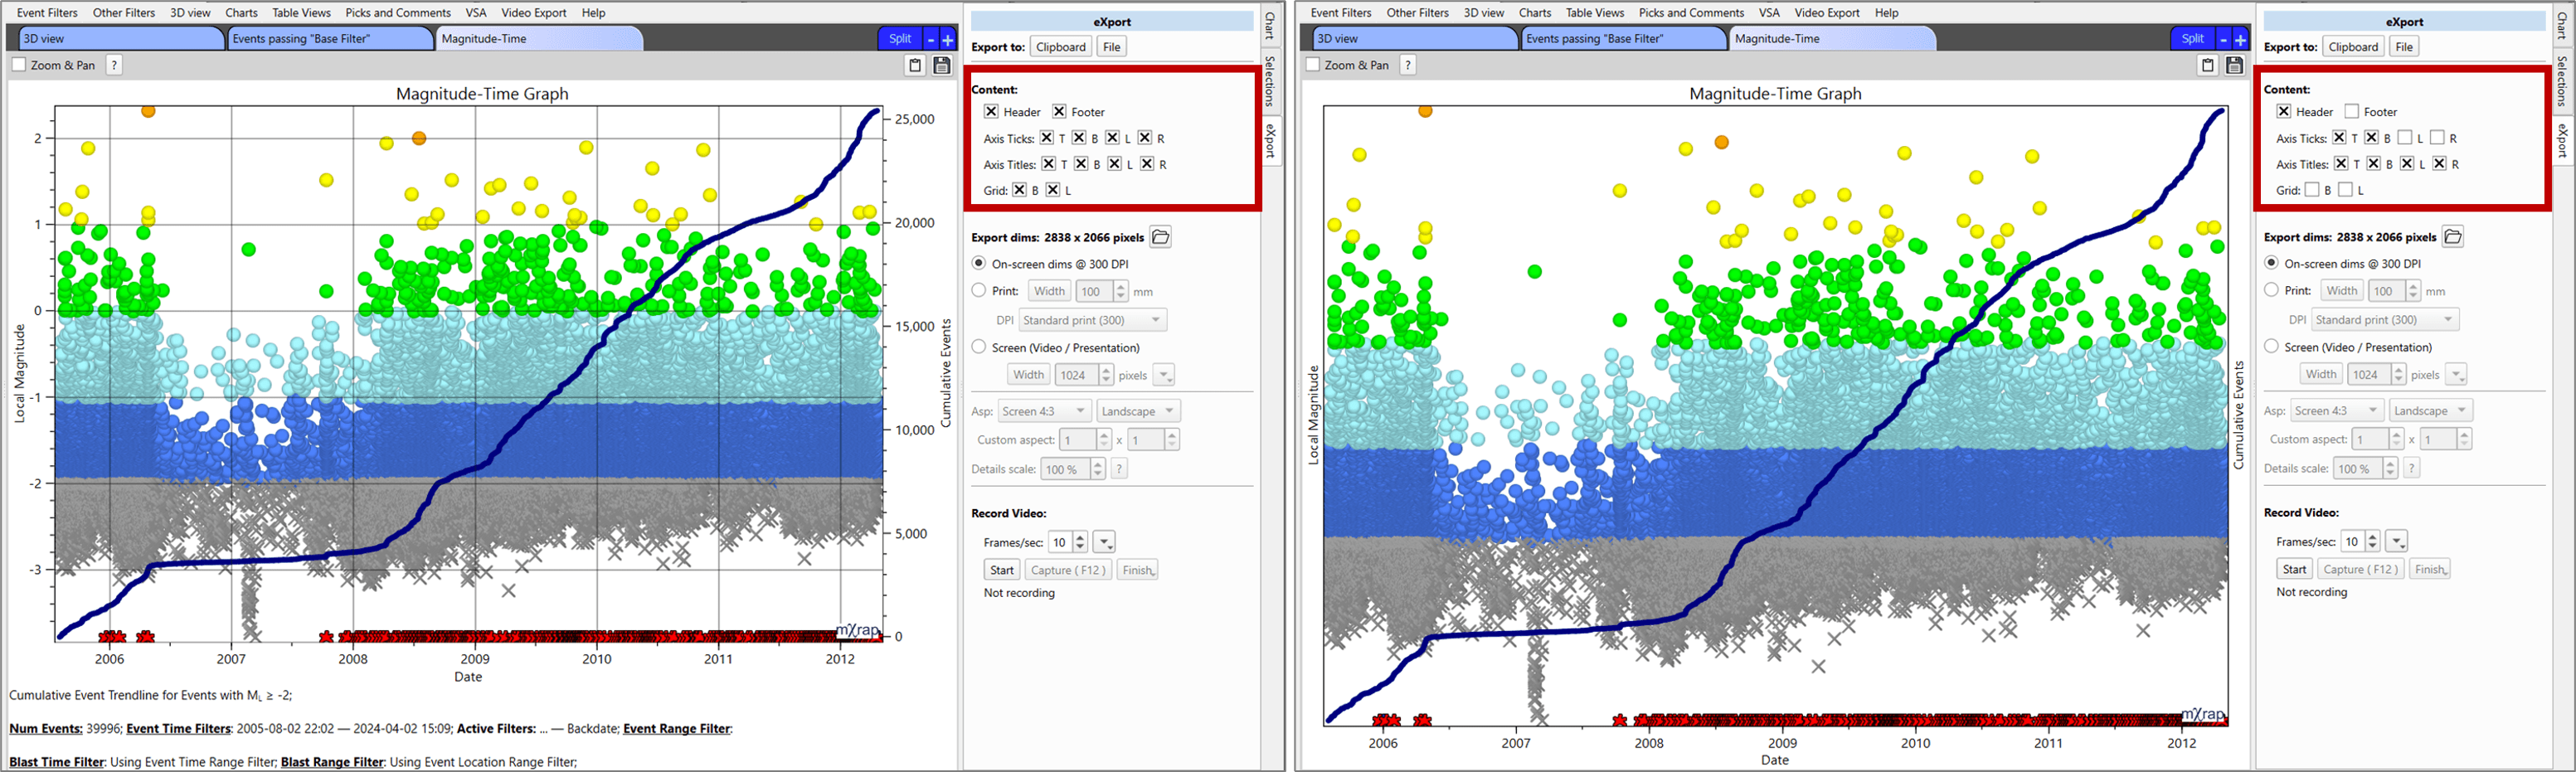
Use the 'Content:' options to change what components are shown:
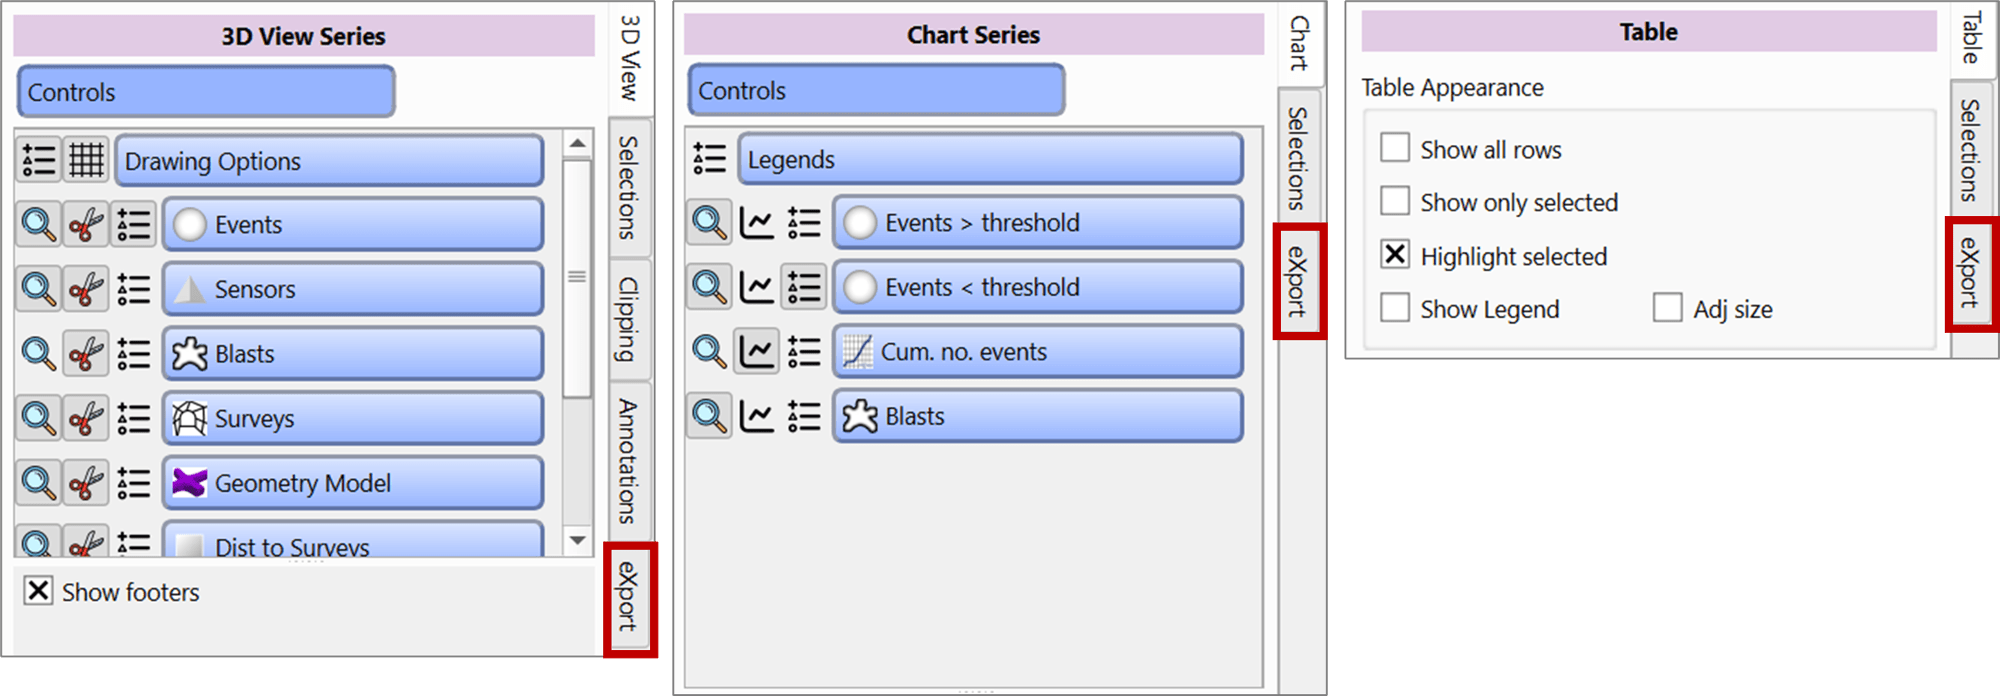
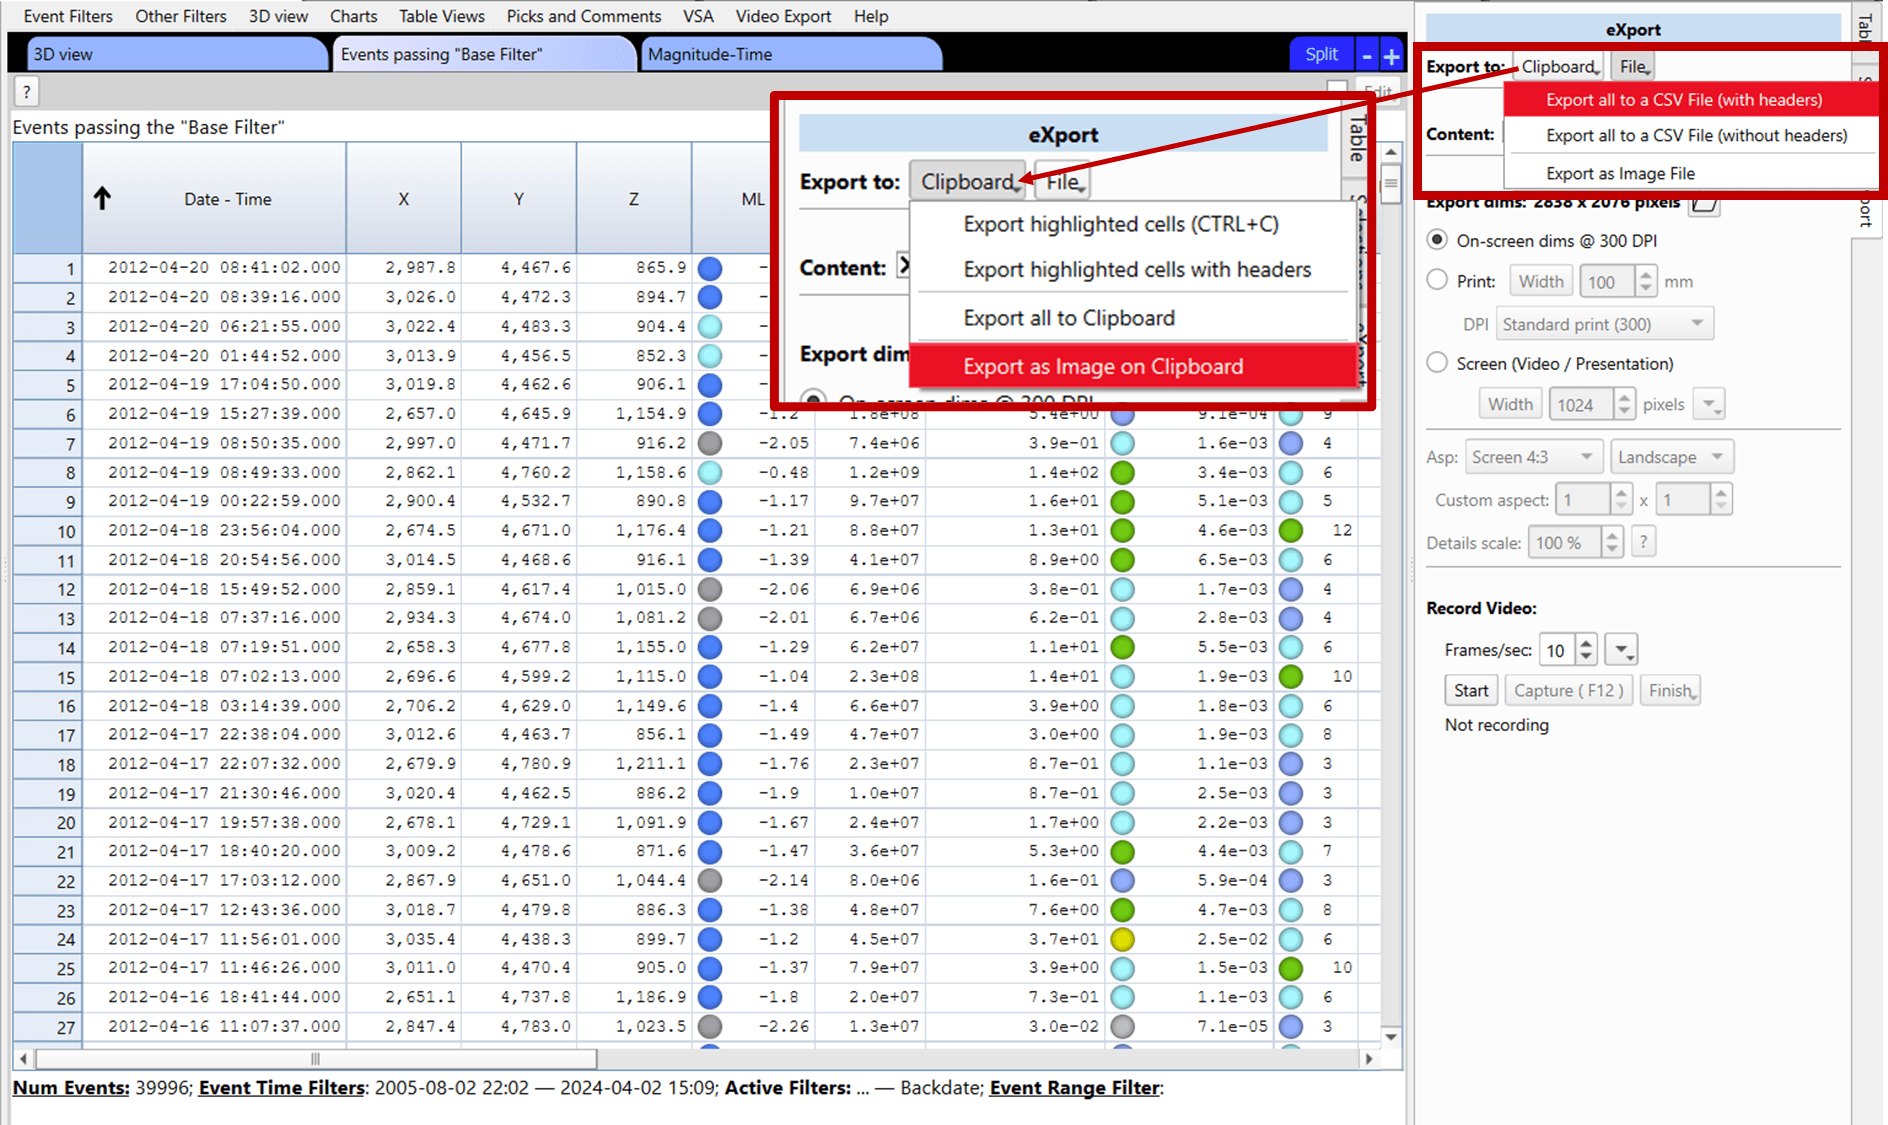
Export tables to the clipboard or as a file:
Create custom videos of your data, analysis and results:
For a more detailed walk through of how to use the export panel, check out the mXrap training video: https://www.mxrap.com/mxvideos/link/22
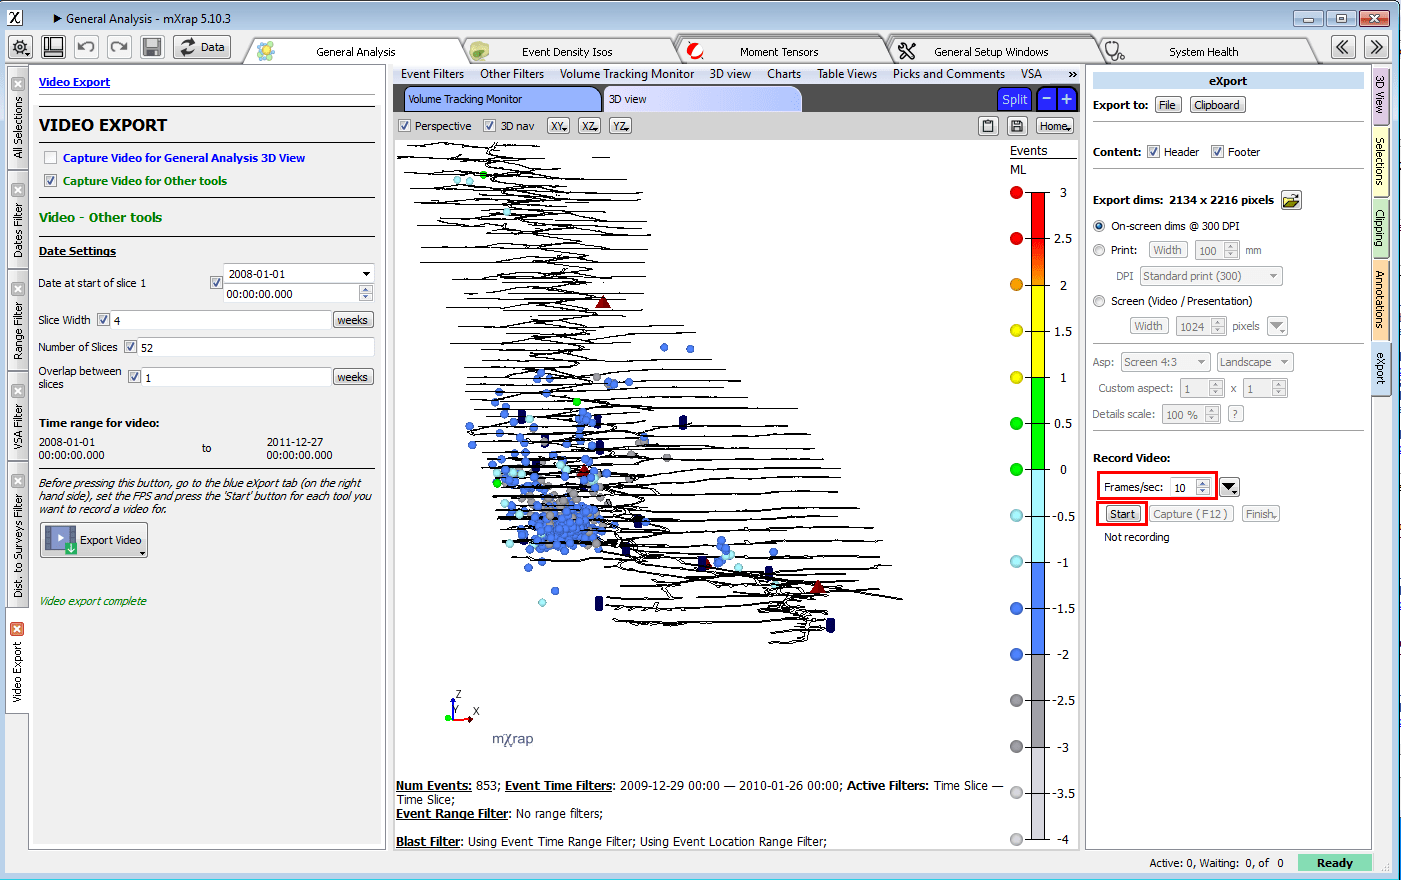
Video creation
To create your videos, simply open the 'video export' panel. You can then choose whether you want to take a video of just the General Analysis 3D view, or of any other tool in General Analysis. To make a video of the General Analysis 3D view, you just need to choose where to save the video, give it a name and a frames per second (FPS). Then you choose the time slice settings (start, slice width and number of slices). You can also make these slices overlap in order to create a smoother video. Once these have been set, simply press the 'Export Video' button and your video will be created.
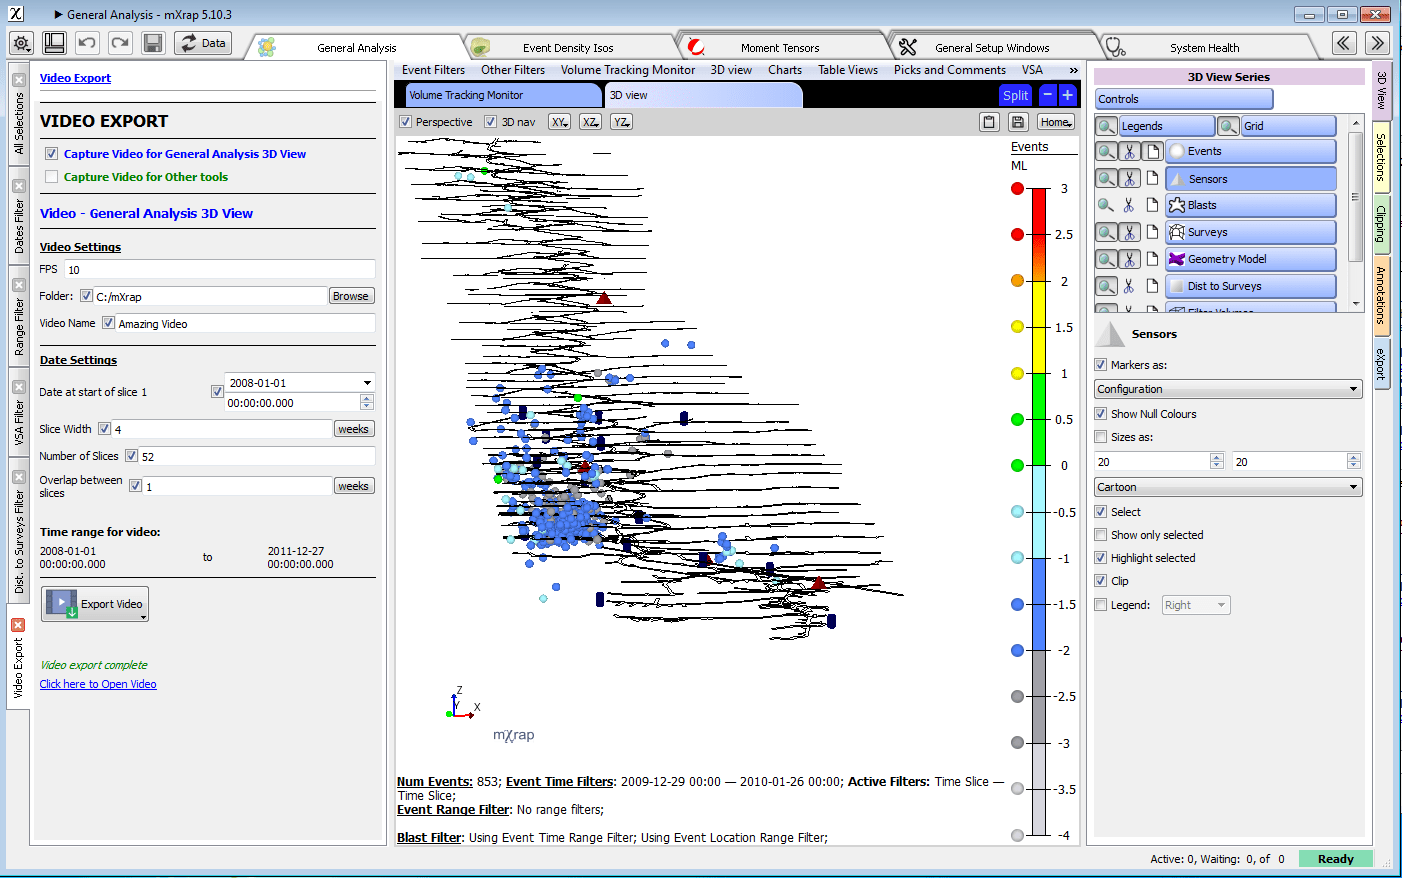
The generic video creation works in a similar manner, however for each tool you want to capture, you will need to go to the eXport tab on the right hand side and choose the location for the video, set the FPS and press start. Then you set the time slicing variables and press the 'export video' button and all the tools which you pressed start for will have a video created for them.