Mine Geometry Model - Minode Generator
Mine Geometry Model Minode Generator is a new utility app which enables you to generate your own new minodes from a mine geometry model. If you're not sure what minodes are or why you would want to generate them, see What are minodes? If you're not sure what mine geometry models are, see Mine Geometry Models Application.
The minode generator app operates on the geometry blocks of a single mine geometry model. Because the mine geometry model represents changing geometry over time, a geometry block might start as development at one point in time and then change to another type (e.g. stope) at a later date. The minode generator considers all blocks that are development at any point in time.
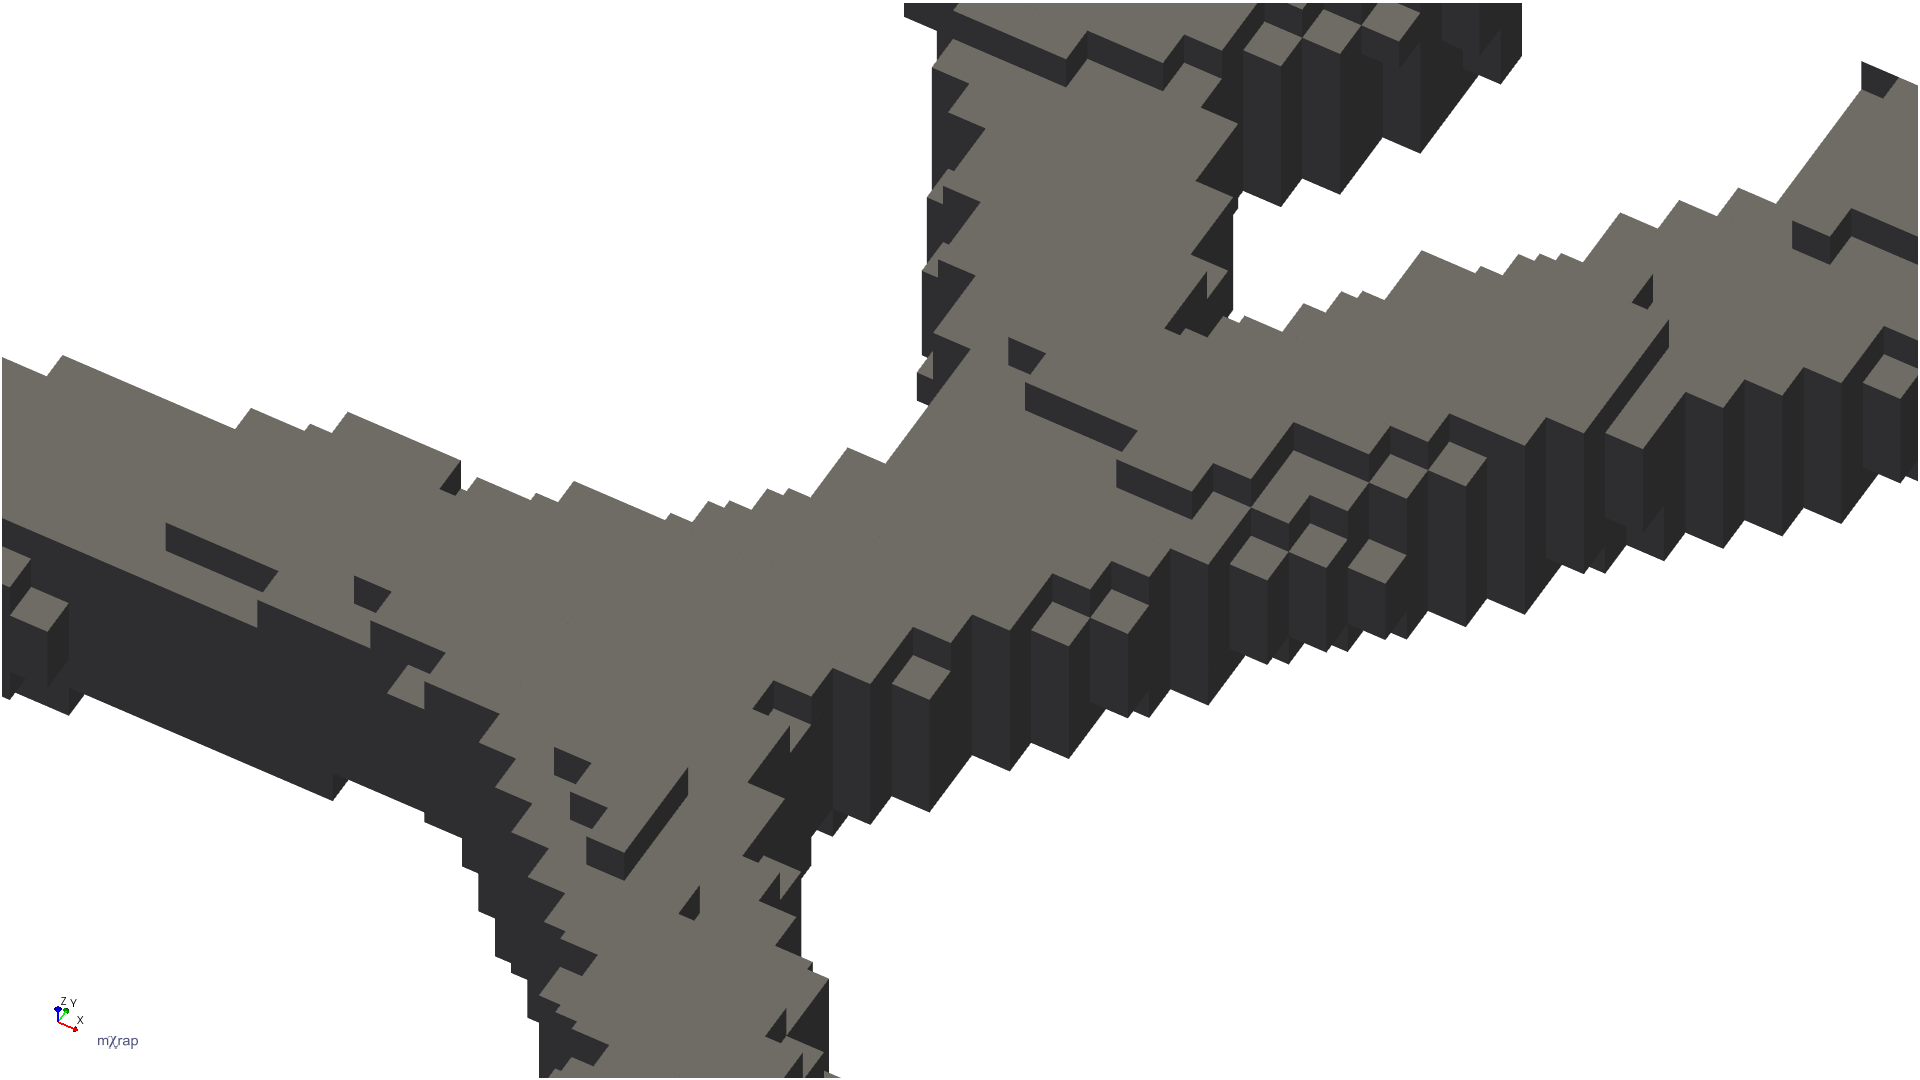
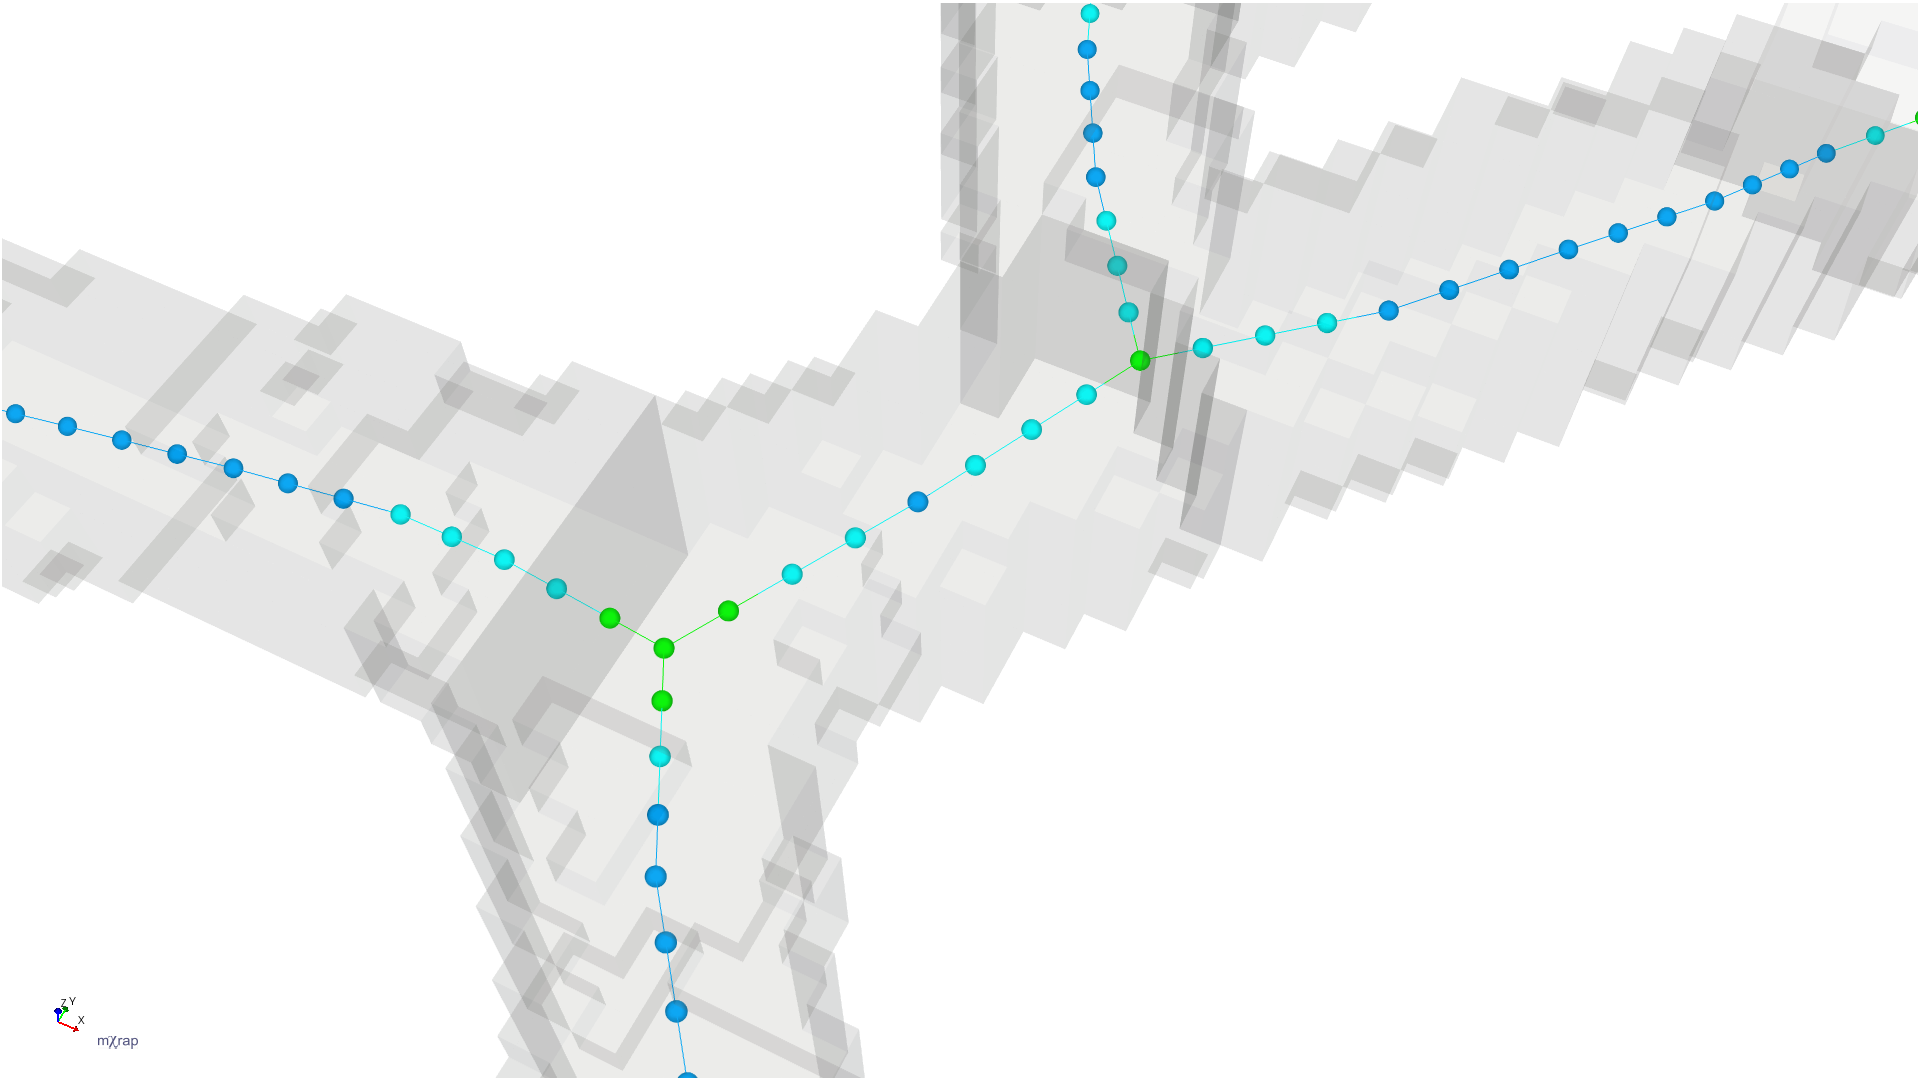
The app then thins the development blocks to create lines through the centre of the development. At each point in the line it also calculates the effective minode span (the width) and height. Finally it creates minodes along the lines, aiming to balance coverage of the geometry with the total number of minodes.
When you are happy with the generated minodes you can choose to either completely replace your existing minodes, or merge the newly generated minodes with the existing minodes (e.g. if your newly generated minodes do not cover all of your development).
The newly generated minodes can be tagged with the Mine Geometry Model steps from their source geometry blocks. Just as the step information is used to show live surveys in General Analysis (i.e. geometry present within the current time filters), it can be used to show live minodes in Hazard Assessment. That is, the assessment will only consider and display those minodes representing geometry which is development within the assessment time period: either the development step's date is within the time period, or it is before the start of the time period and is still effective (it has not been replaced by, e.g. a stope step, in the intervening time). To enable this option in Hazard Assessment, in the Hazard on Excavations window, go to the PPV Controls panel, tick Show advanced controls, and then tick Filter Minodes By Assessment Time. The below video shows an example of changing minodes over time.
The minode generator also supports generating minodes for vertical development. This will happen automatically if there is vertical development in the mine geometry model. If you want to exclude vertical development in the Hazard Assessment app, in the Hazard on Excavations window, go to the PPV Controls panel, tick Show advanced controls, and then untick Include Minodes In Vertical Development.
What are minodes?
Minodes are what we use in multiple places in mXrap if we want to assign information to development. They are just point locations, dotted along your development at regular intervals. Things like ground support and PPV hazard are really only relevant for development locations, so minodes are our way of denoting these places. Minodes are also used to calculate the span of the excavation at that point. The tunnel length is also used in the Hazard Assessment app.
Using the 'Minode Generator' App mXrap users can create minodes using their Mine Geometry Model or survey files. Minodes are not generated automatically and should be updated periodically to reflect new development.
If you're planning on using your Mine Geometry Model to update your minodes, this is a good oportunity to update your model using the 'Mine Geometry Models' app.
Minode Update Procedure
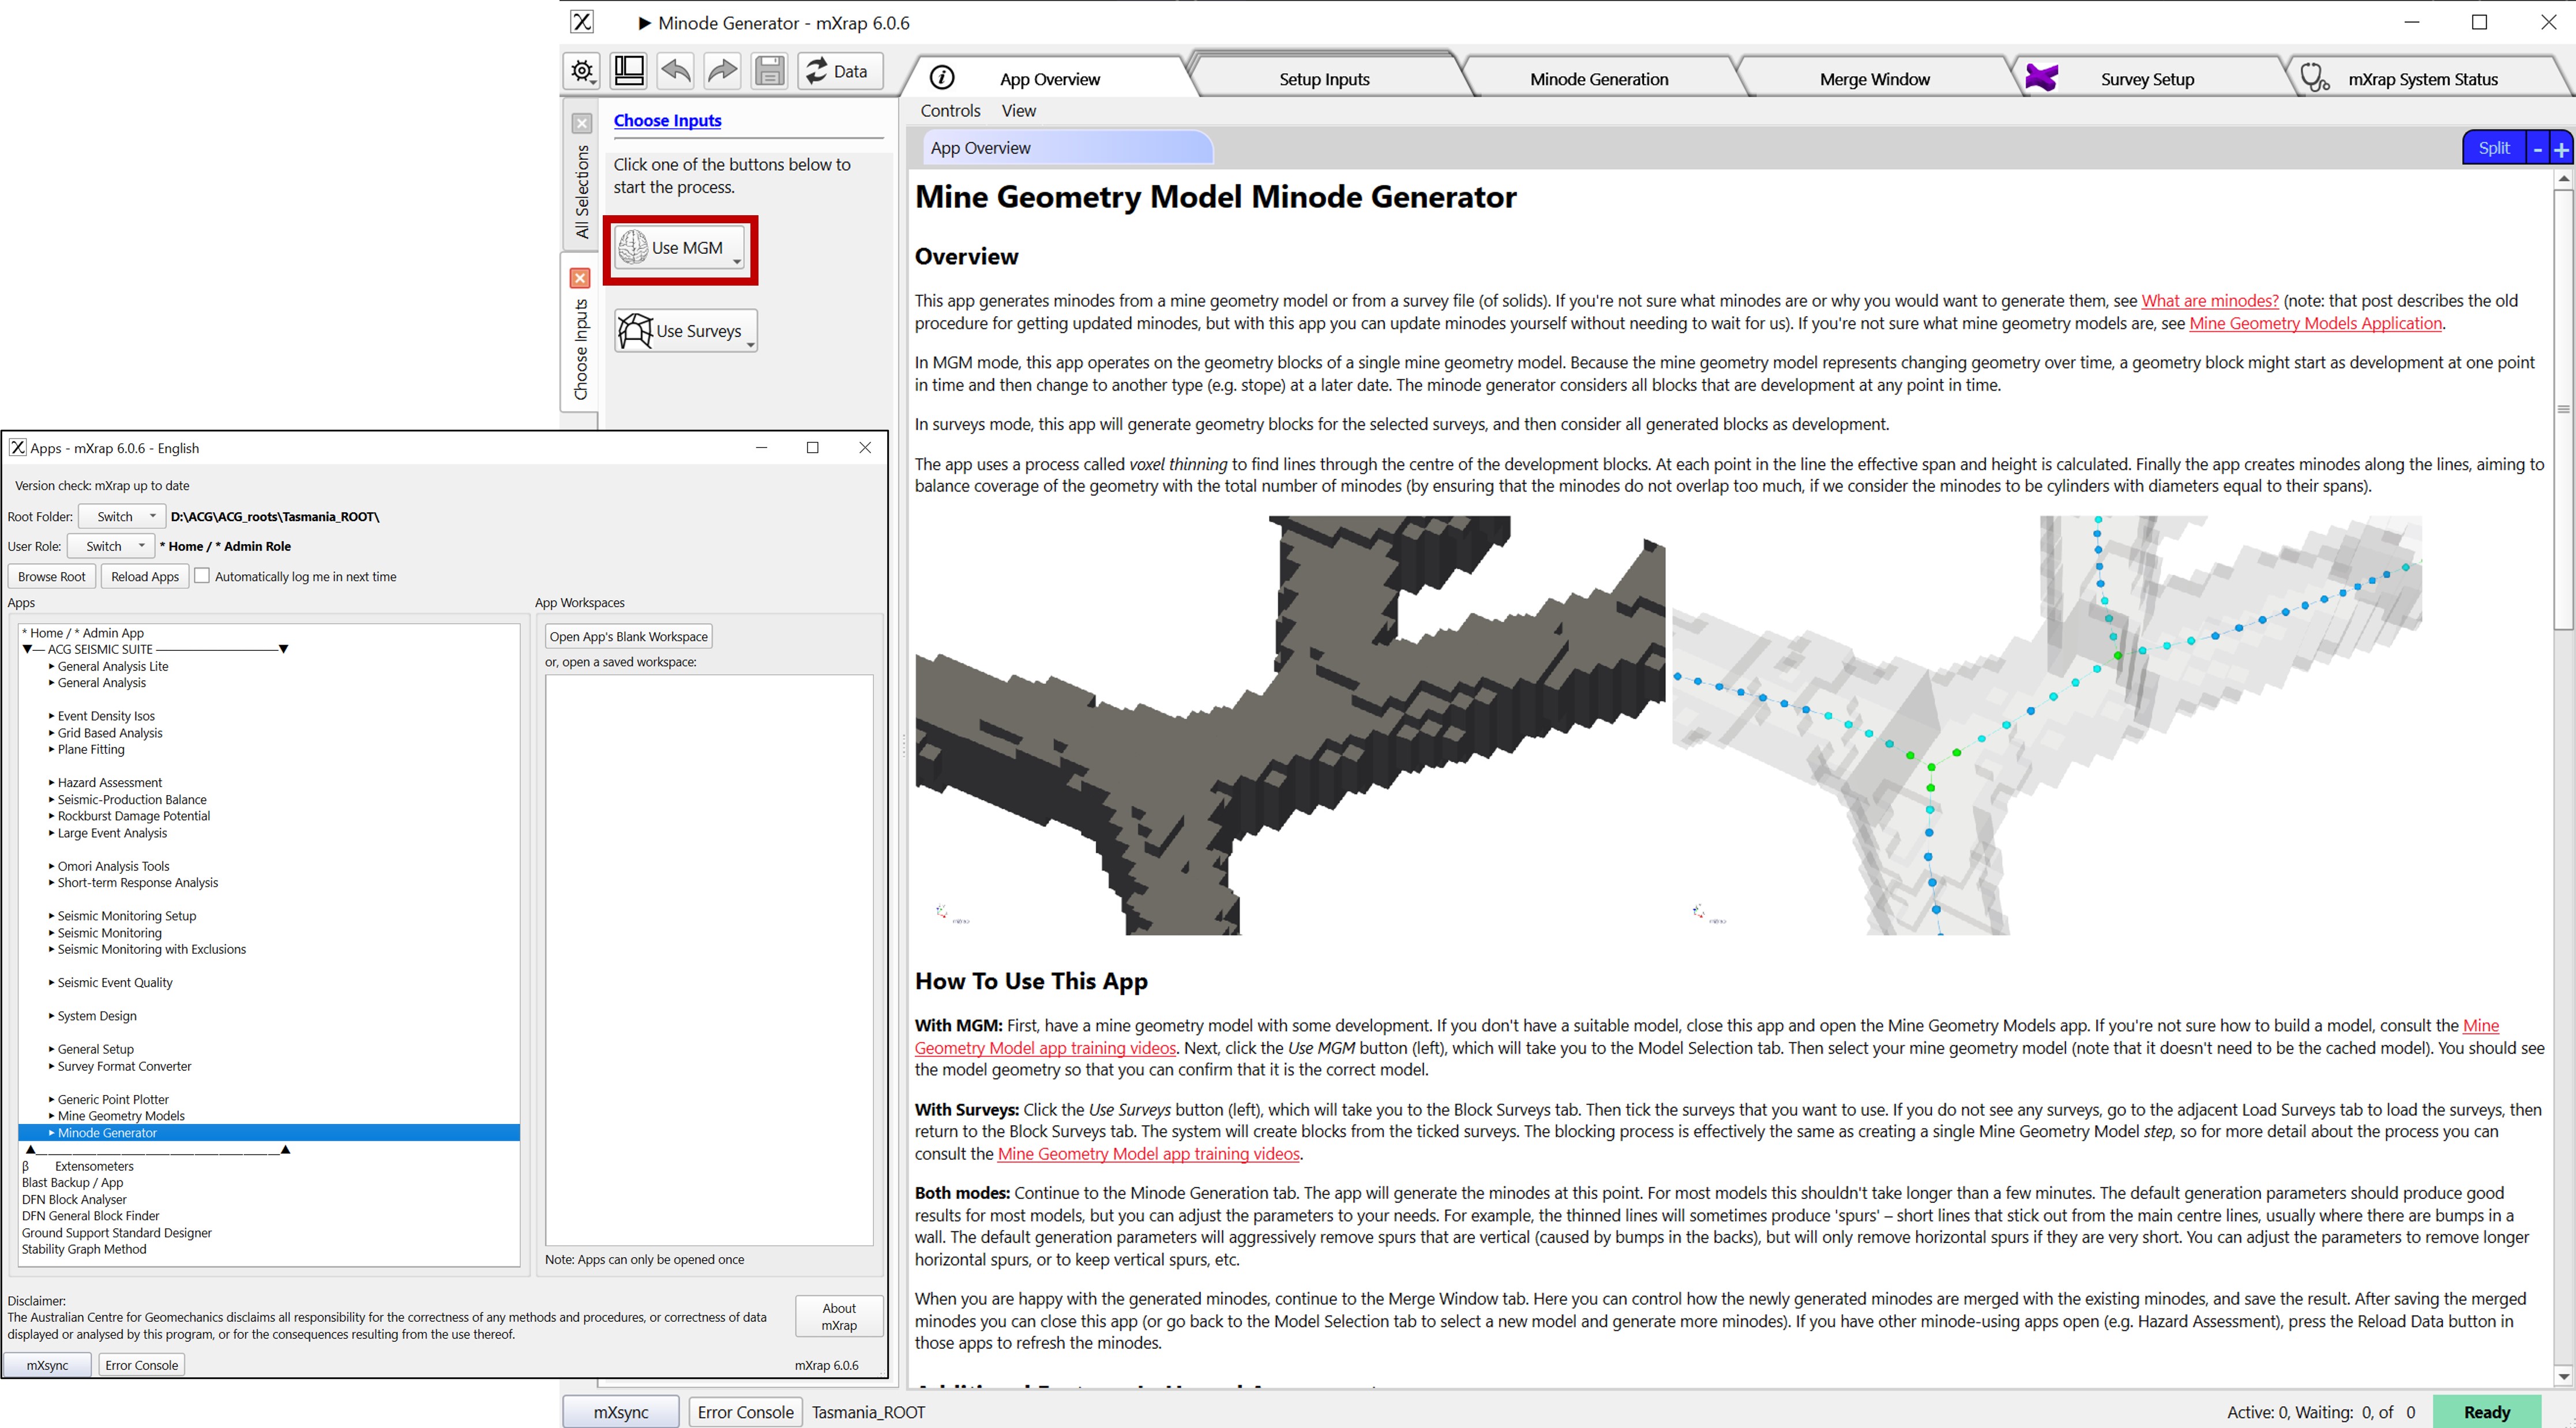
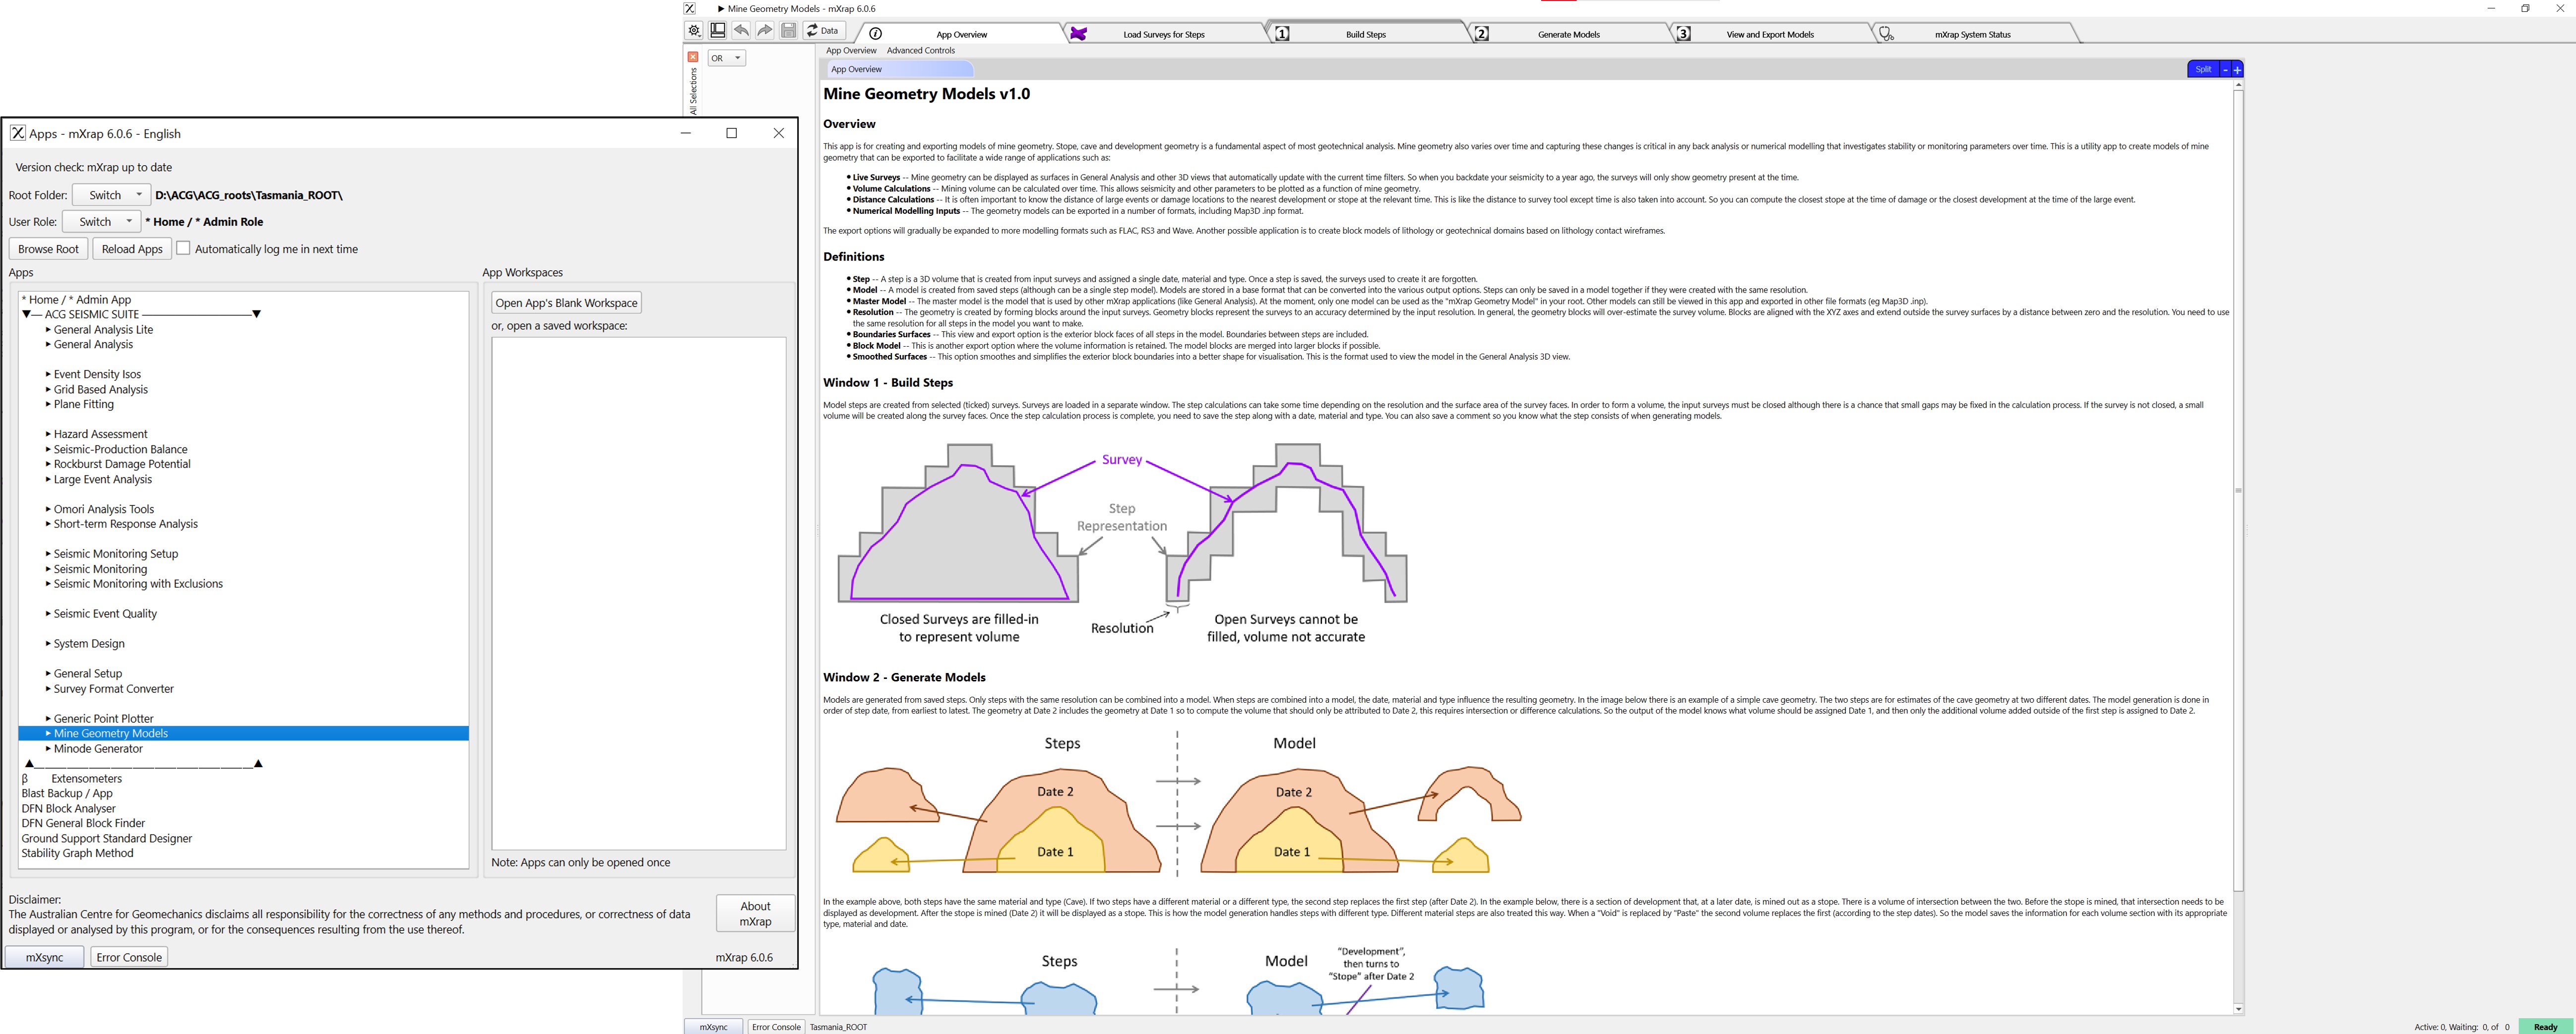
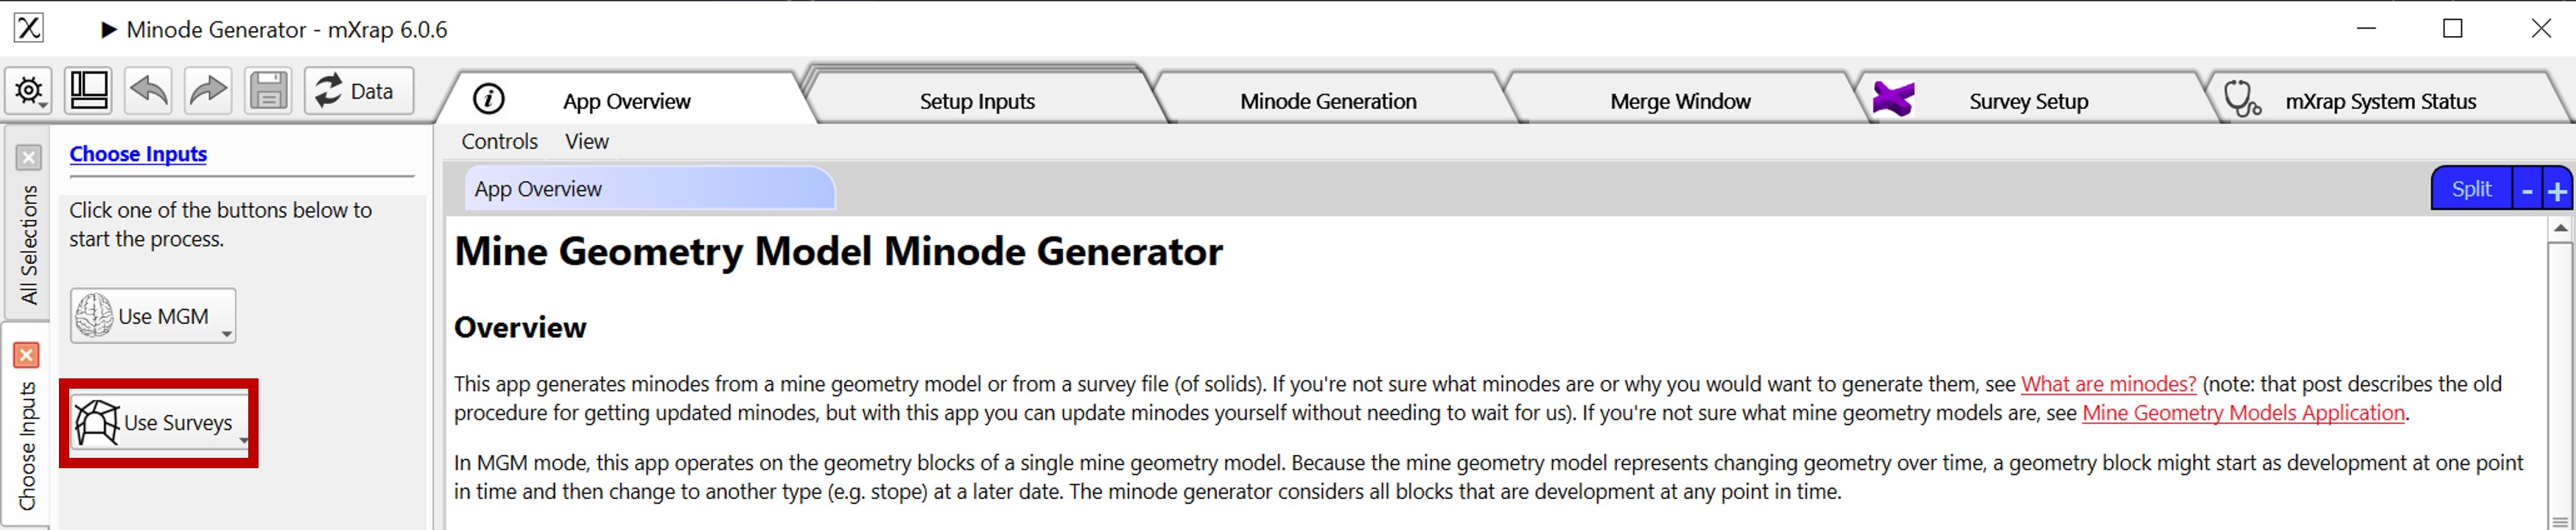
Open the 'Minode Generator' app and choose the input you want to use to generate your minodes.
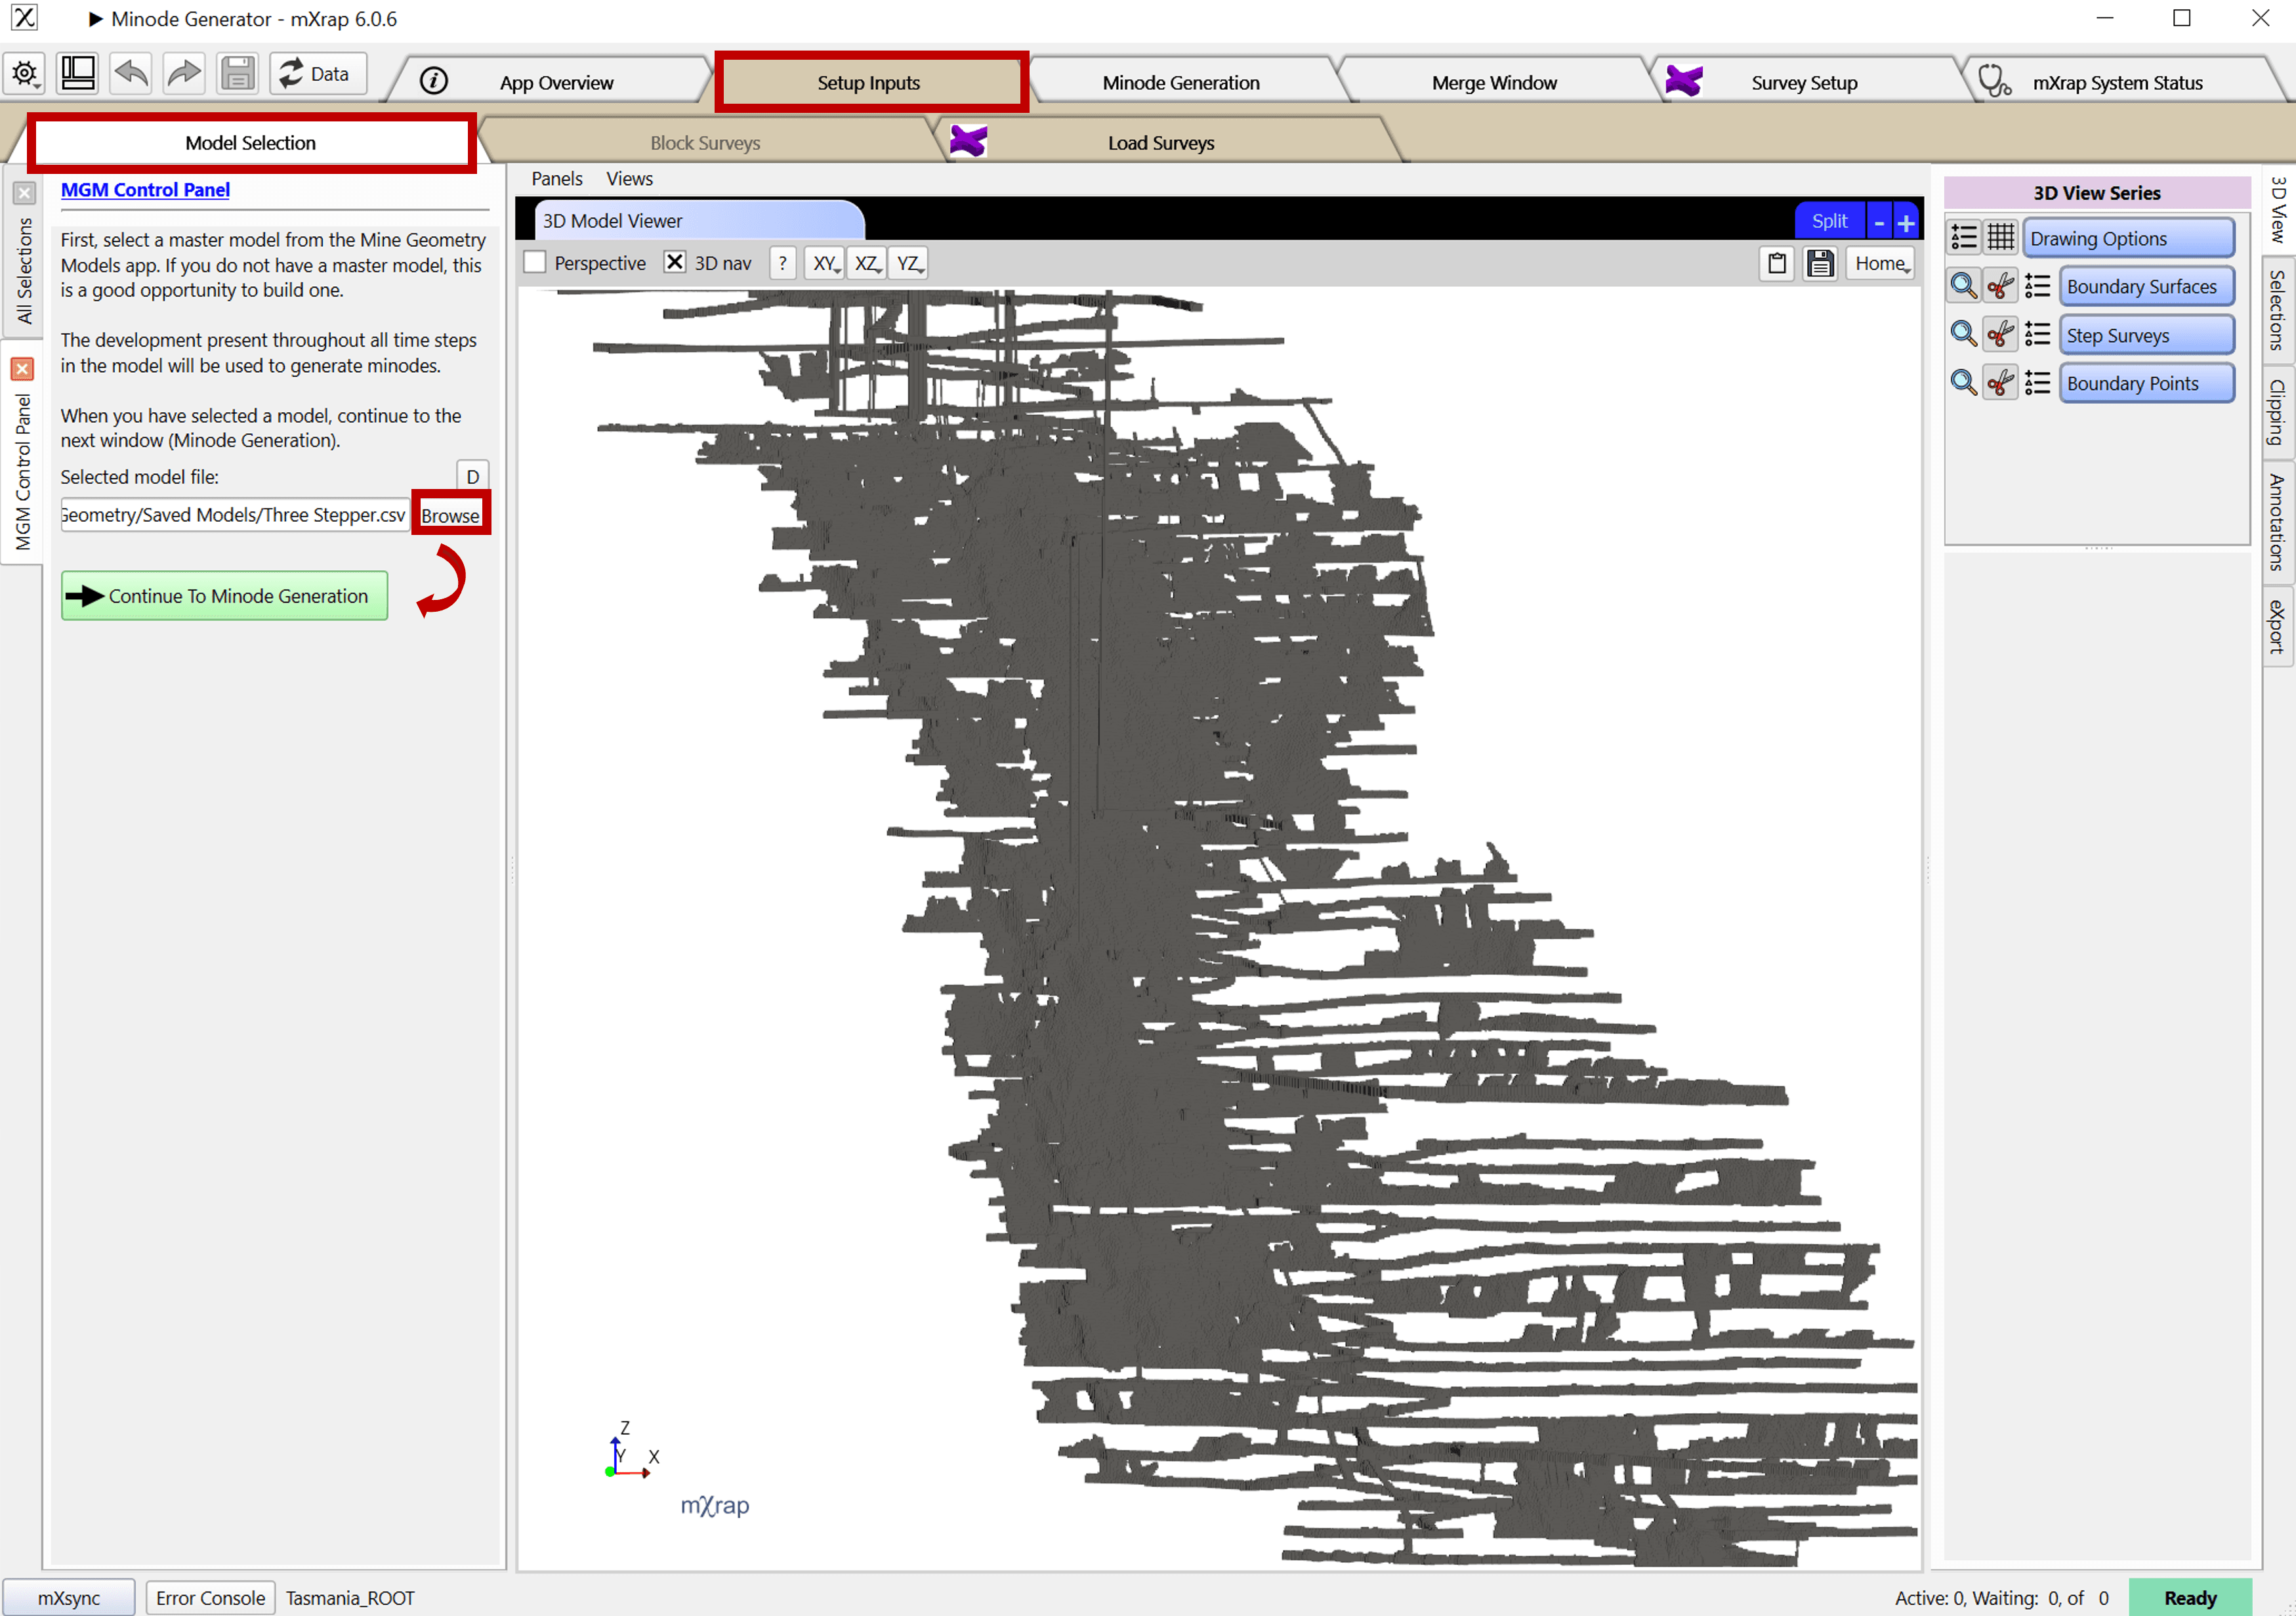
First we will look at the procedure using the Mine Geometry Model or MGM (as shown left), and subsequently we will look at the procedure using Surveys.
Select the Mine Geometry model you want to use, it does not have to be the currently cached model.
Use the 3D Model Viewer to preview the model and 'Continue To Minode Generation'.
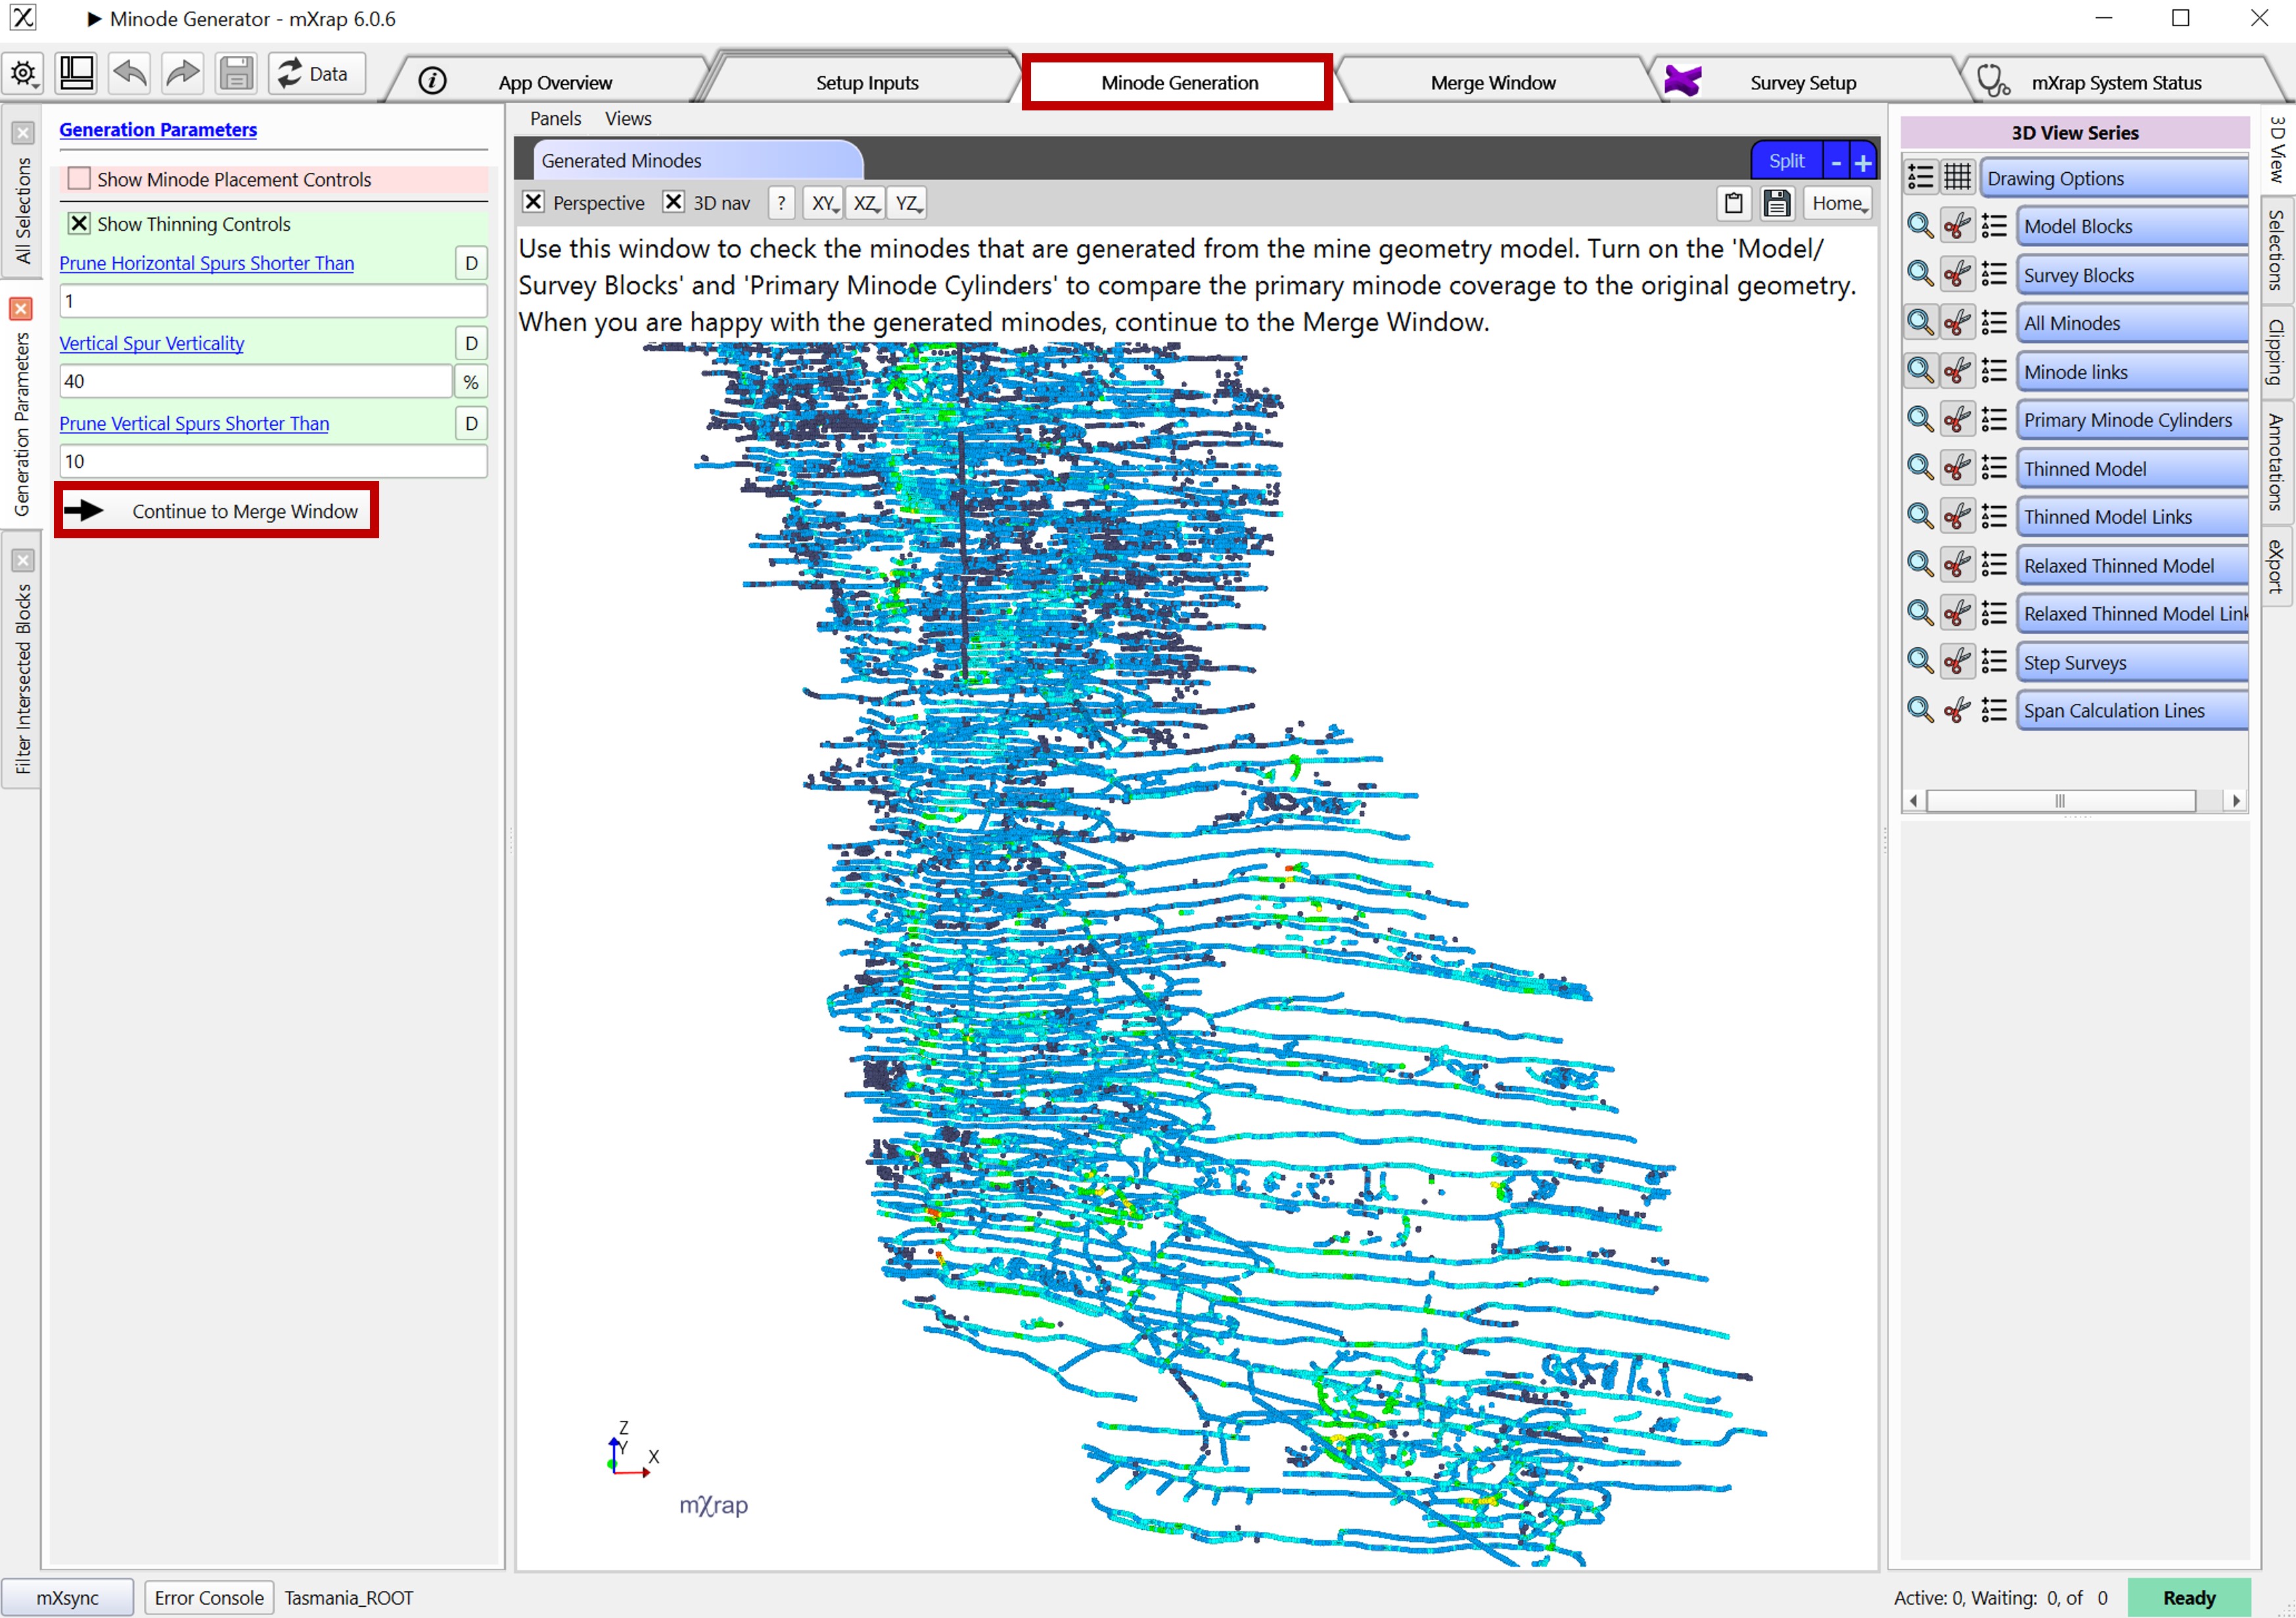
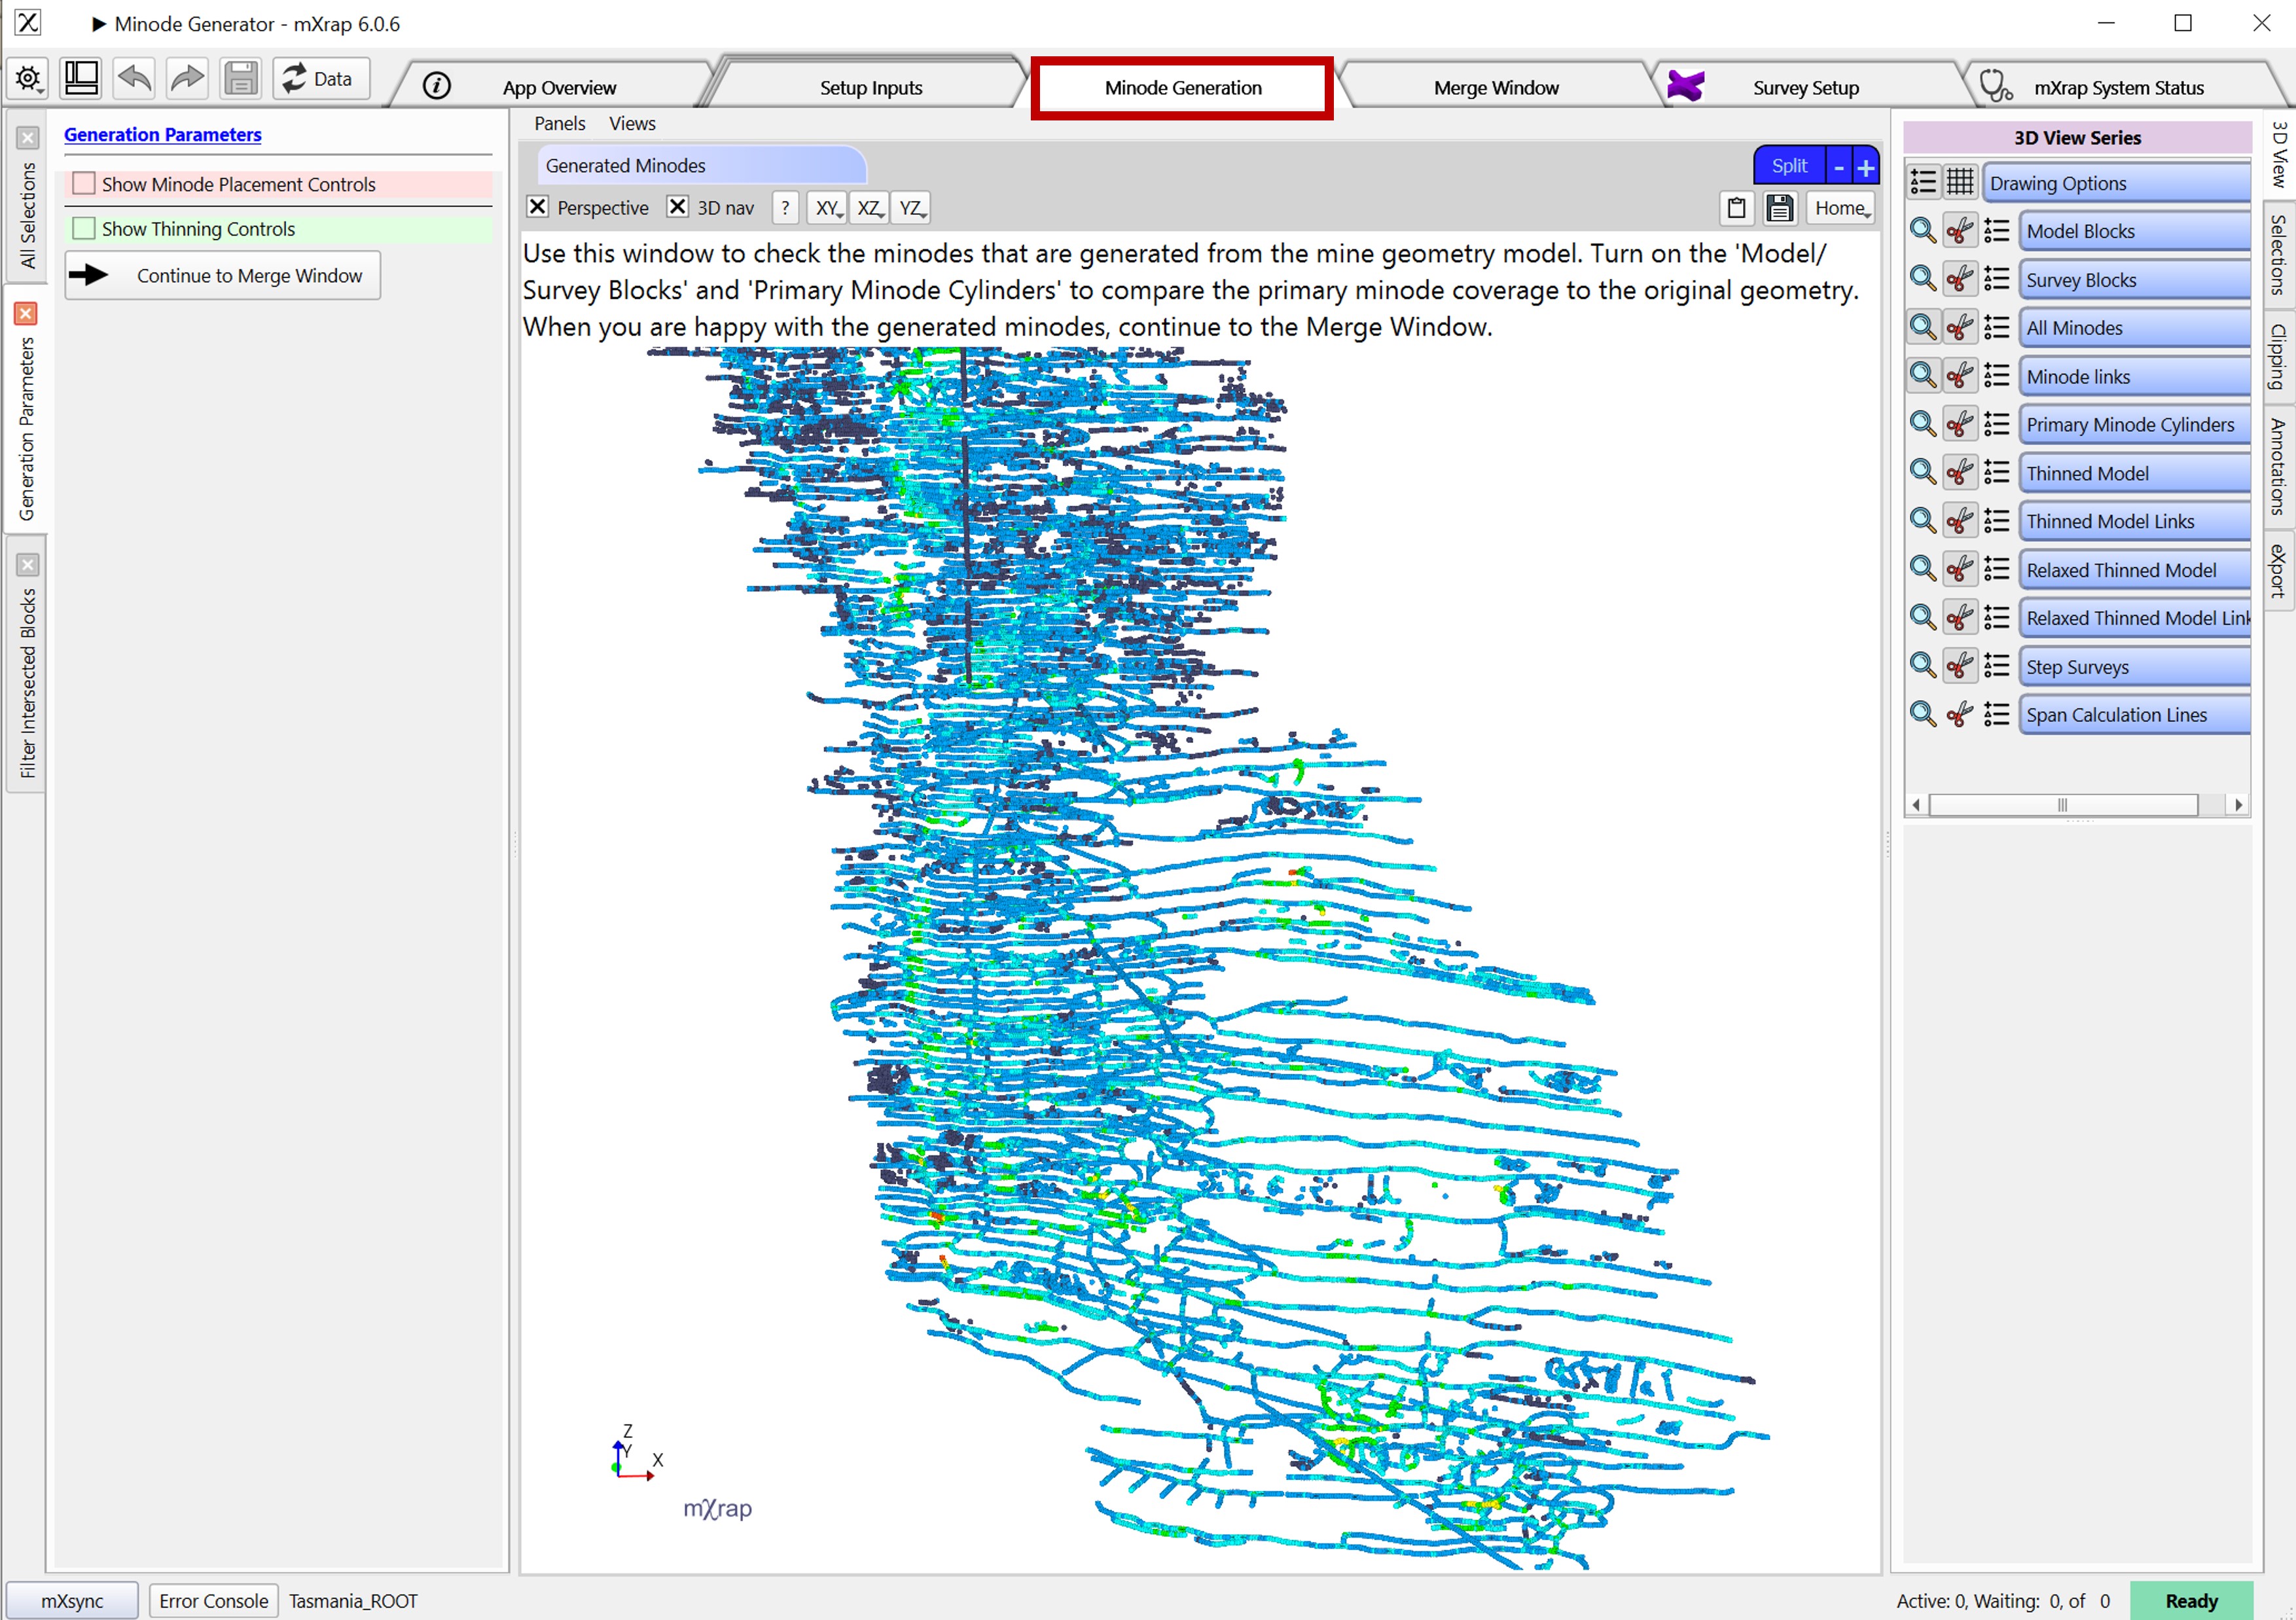
In the 'Minode Generation' tab use the generation parameters and other panels to generate appropriate minodes. When you are happy with the output, 'Continue to Merge Windows'.

In the merge window, exsisting minodes are shown in white and newly generated minodes are shown in green. Verify the options in the 'Merge Controls' panel suit your needs before hitting the button to 'Save Merged Minodes'.
Once the action is complete, your minodes have been updated and you can hit the reload data button in any open windows to see and use the new minodes.
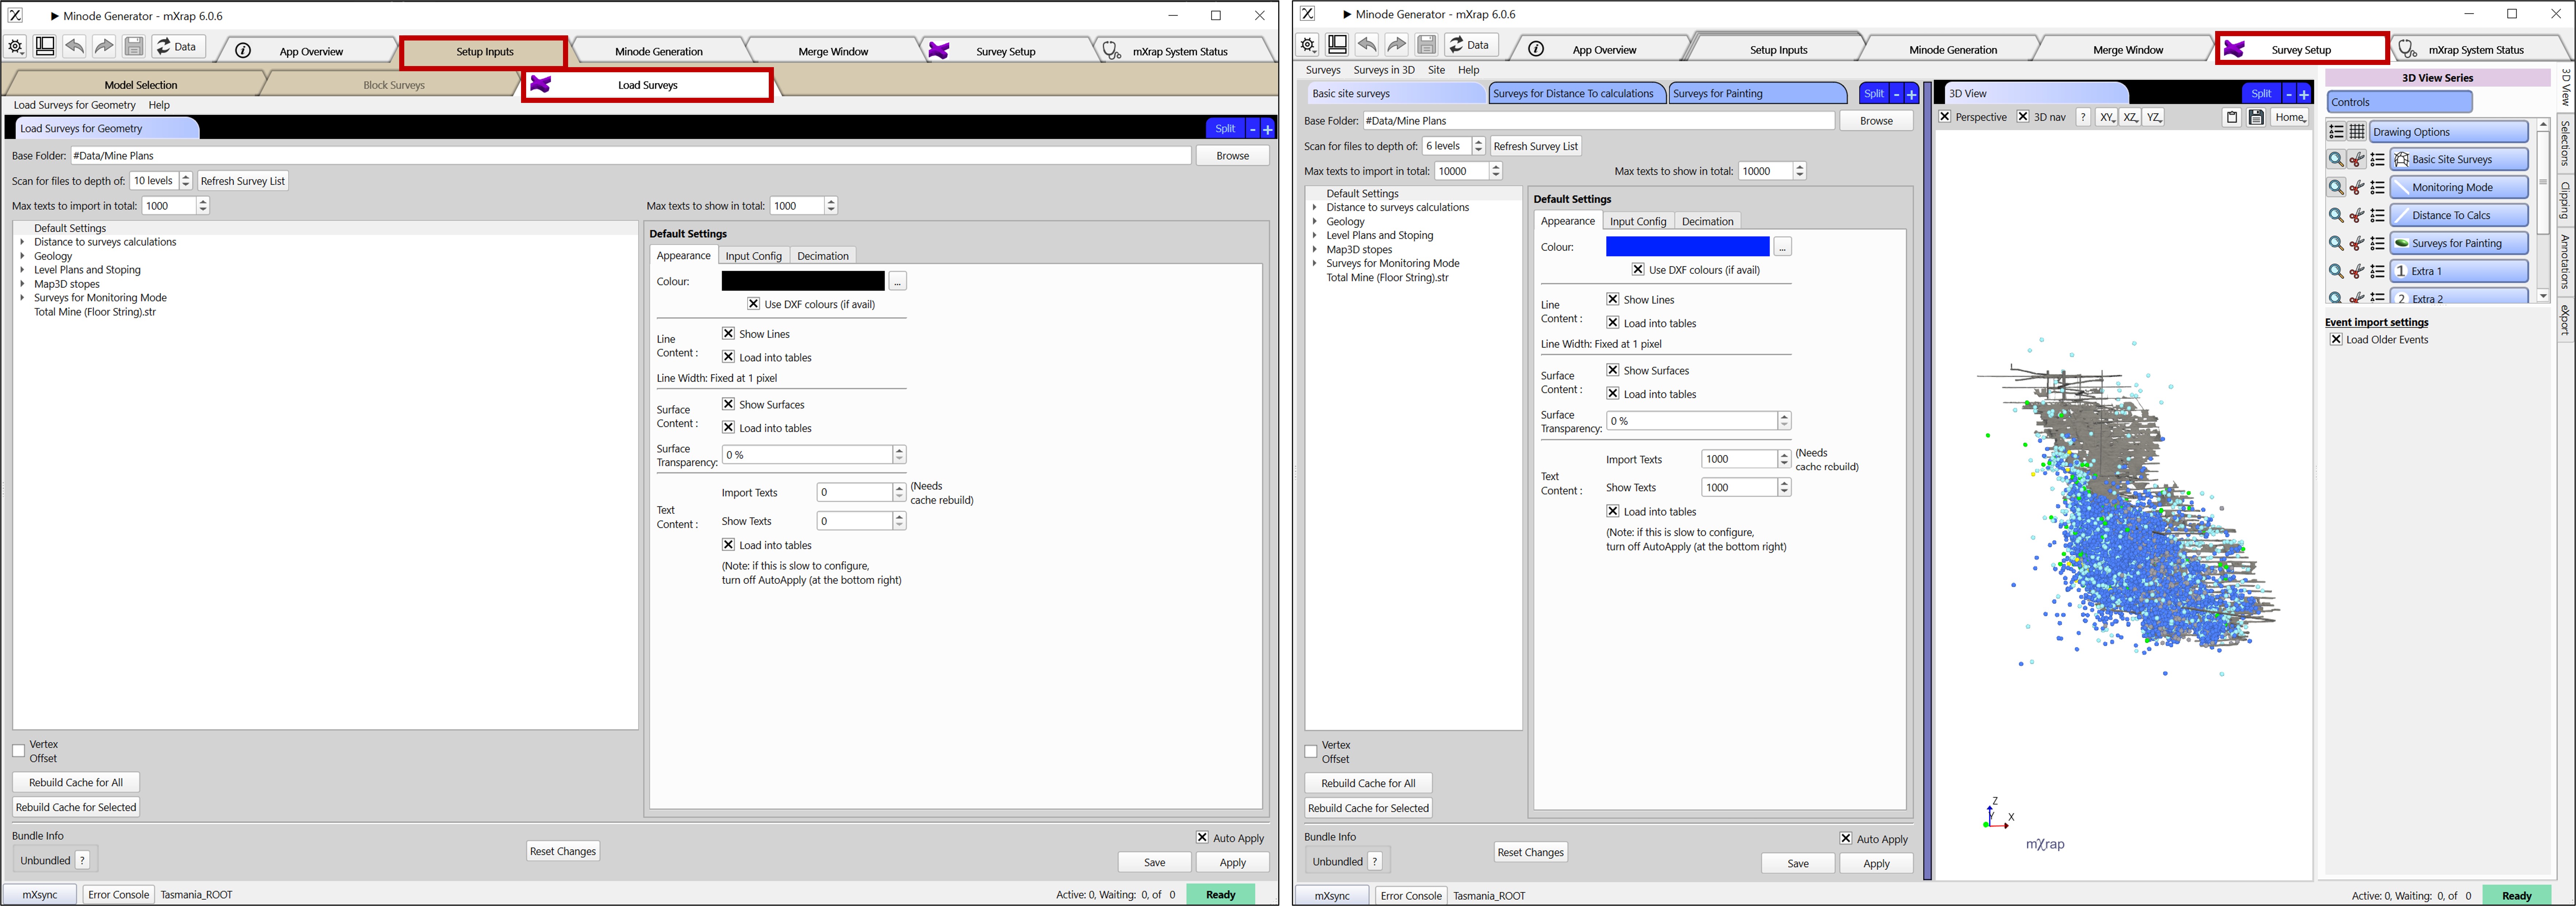
When using surveys instead of the mine geometry model to generate minodes, the desired surveys must be loaded in using the 'Survey Setup' tab or 'Load Surveys' tab found under 'Setup Inputs' as shown below.
To load the surveys, select the desired folder or file and hit 'Rebuild Cache for Selected', followed by 'Save'.
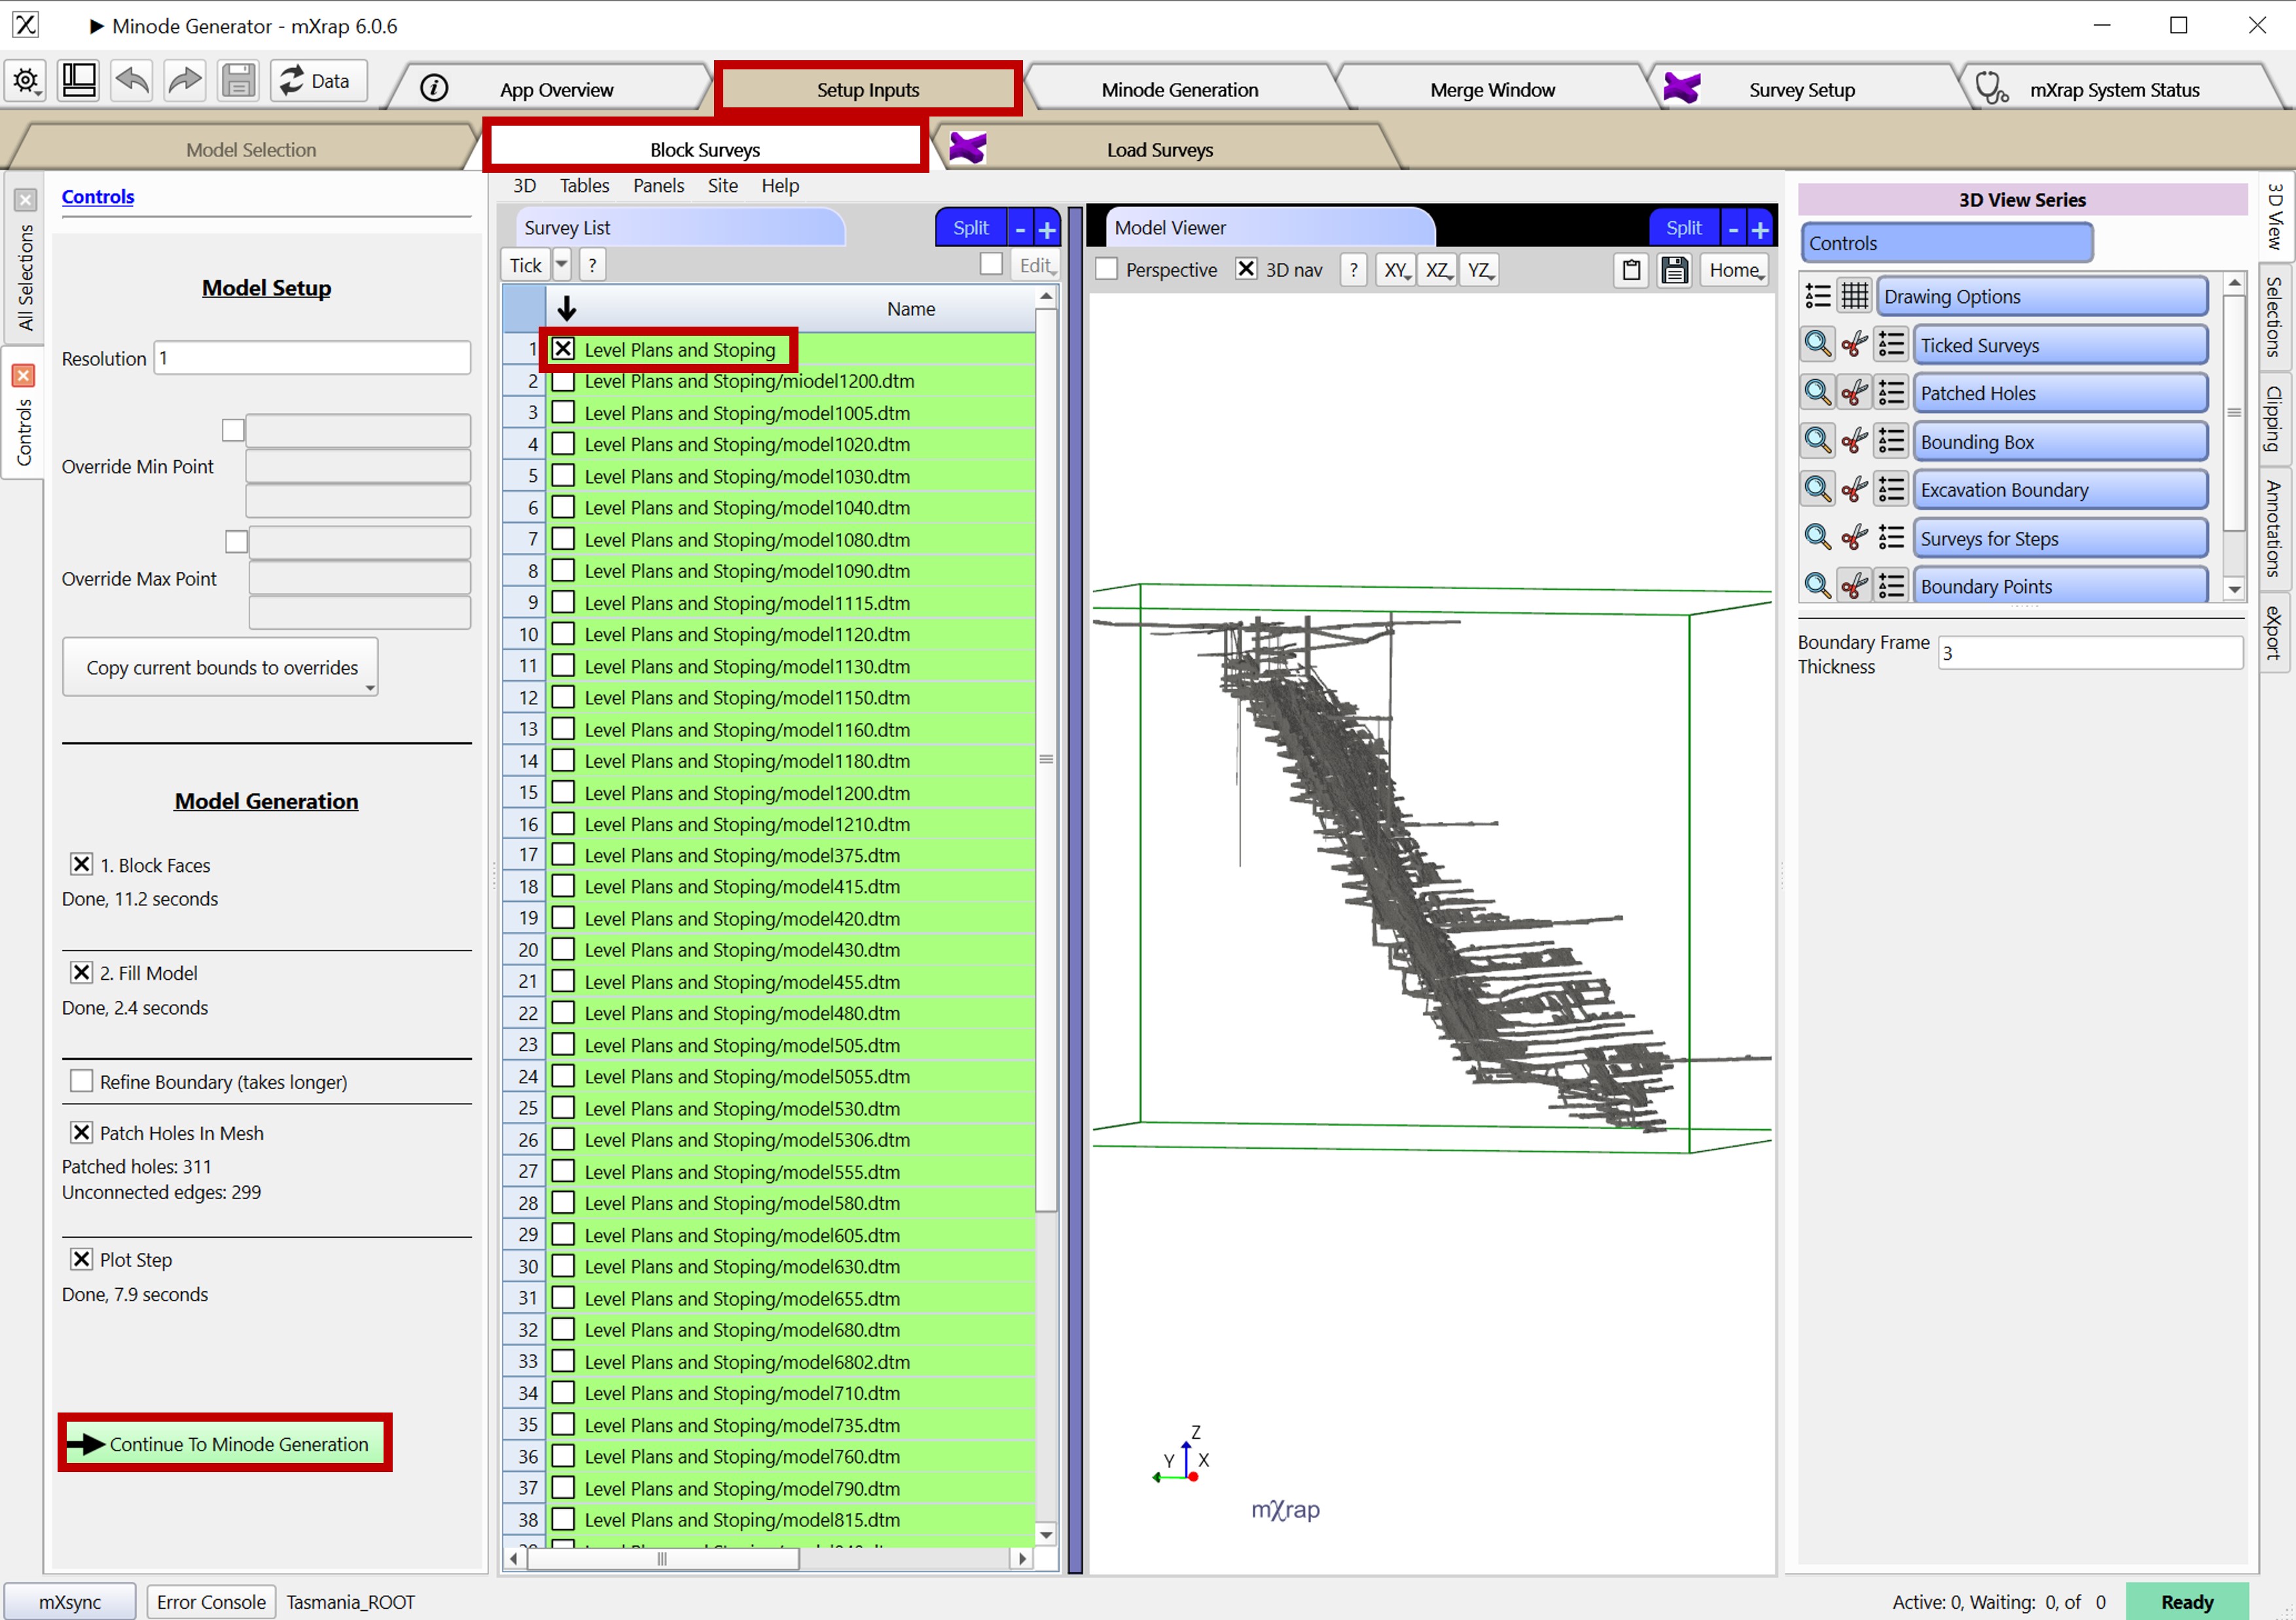
In the 'Block Surveys' tab under setup inputs, select the surveys you want to use to generate minodes.
Use the Model Viewer to preview the selected surveys and use the controls panel to 'Continue To Minode Generation'.
Use the Minode Generation tools in the same way they were used with the mine geometry model input to generate appropriate minodes.
When you're happy with the minodes, continue to the merge window as previously shown.
For a demonstration of how to update minodes check out the training video.